Enable the Landmass Plugin
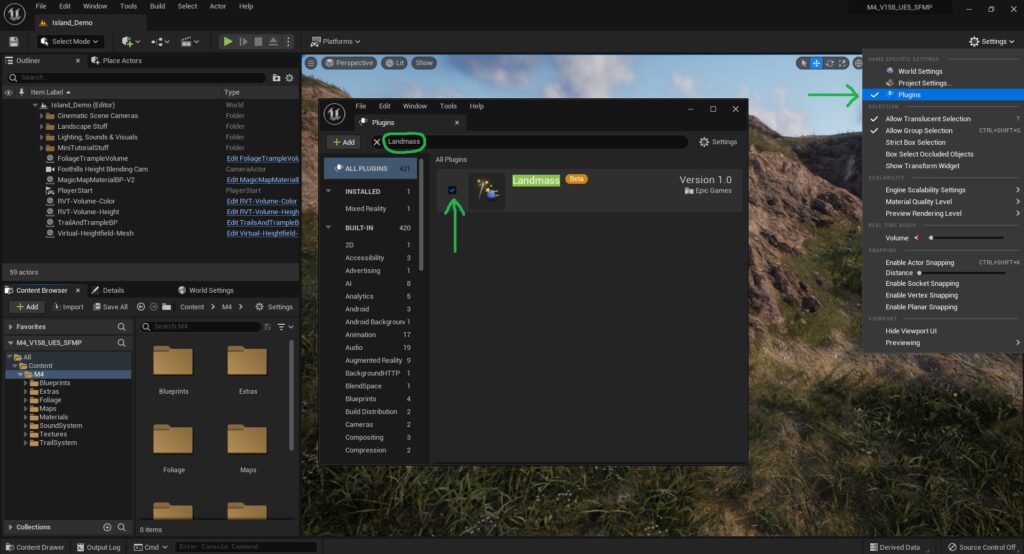
Go up to “Settings” at the top of the Editor and click on “Plugins“, to open the Plugins window.
In the Plugins window type in “Landmass” into the search bar.
Activate the Landmass plugin. Once it’s activated, restart the editor.
Create a New Landscape
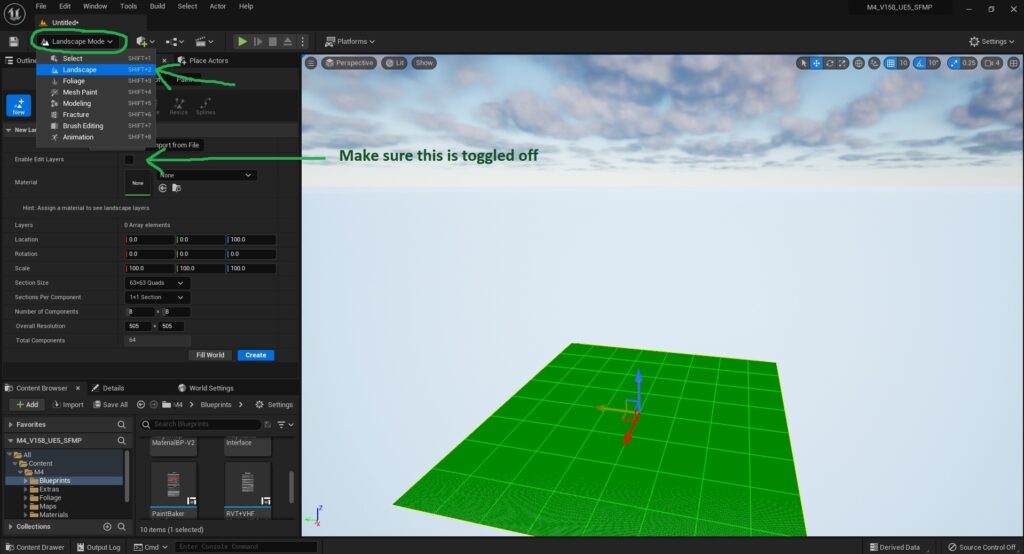
On a new level, create a new Landscape by going to “Select Mode” at the top of the editor and clicking “Landscape Mode”.
In the Landscape Menu, we can set the size and dimensions of our new Landscape.
Make sure that “Enable Edit Layers” is NOT toggled on, when creating your landscape. Else the Generator’s changes will not be pushed to the Landscape.
Important: The Terrain Generator currently supports Epic Recommended Landscape Sizes of 505 x 505, 1009 x 1009, 2017 x 2017, 4033 x 4033, and 8129 x 8129. (WARNING: 8129 x 8129 is not currently supported in UE 5.1 due to an engine bug with that version)
For more detailed info on the settings contained in the UE Landscape Menu, please reference the Landscape Technical Guide, written by Epic Games.
Bring in the LandMassPreviewMesh
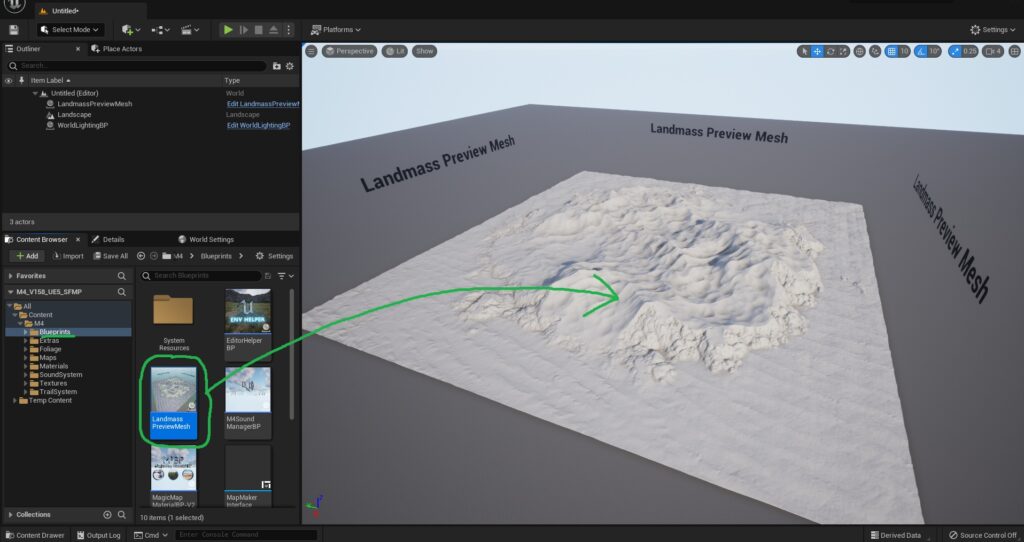
After the Landscape has been created, go to the M4/Blueprints folder.
Drag and drop into the world, the file called “LandmassPreviewMesh“
This mesh allows us to see our changes in real time and effect the Landscape.
Position the LandmassPreviewMesh
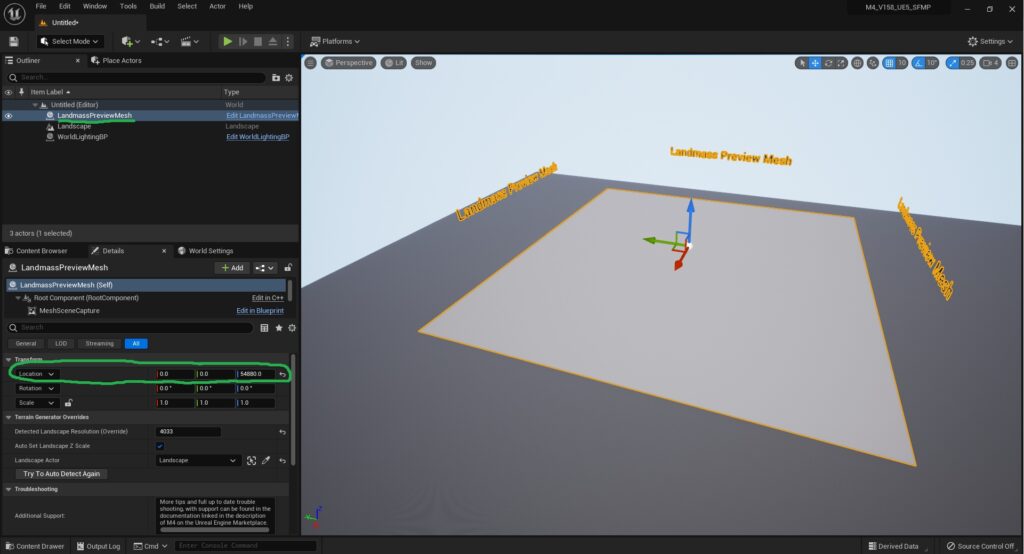
Click on the LandmassPreviewMesh once it’s in the world.
Reset it’s location to 0,0,0. Then we can move it anywhere above the Terrain on the Z Axis.
This step is to ensure that the Erosion Mechanic aligns properly.
Open the Terrain Generator UI
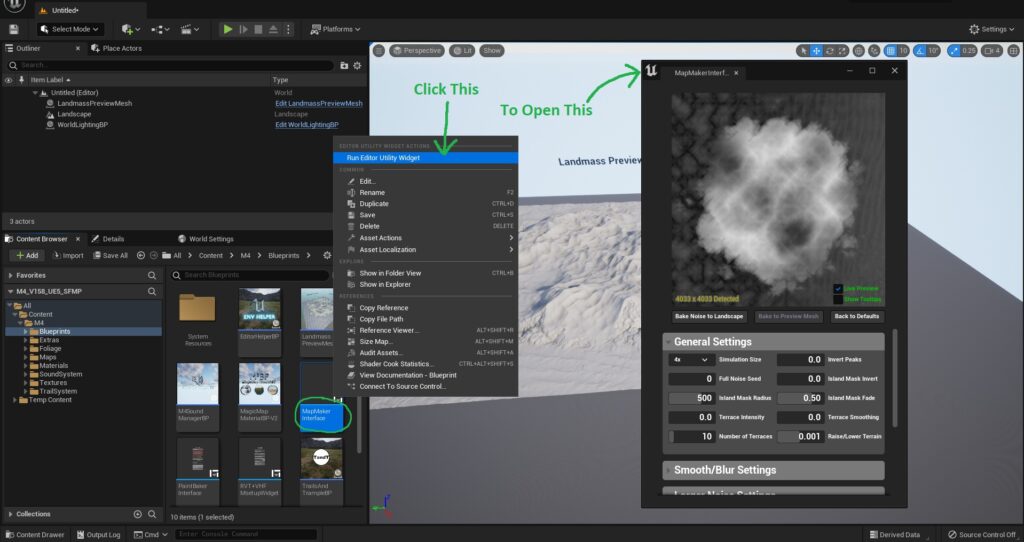
Go to the M4/Blueprints folder and Right Click on the file called “MapMakerInterface“
In the right click menu, press “Run Editor Utility Widget“. This will pop up a window with the Terrain Generator UI in it.
Dock this “Map Maker Interface” window anywhere you wish.
Generate Your First Terrain
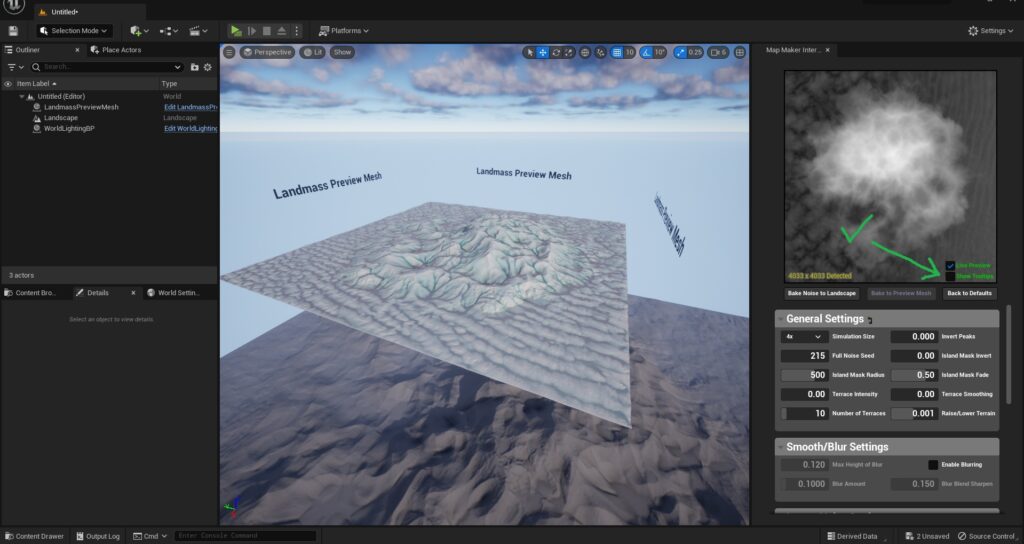
From the Terrain Generator UI we can create our first terrain.
When you’re finished, just press the “Bake Noise to Landscape” or “Bake Erosion to Landscape” button to push any changes to the Landscape Actor.
For a full description of what each slider and toggle does in the UI, see this guide here.
Or tick on the “Show Tooltips” toggle near the top of the UI and it will describe each slider as it’s hovered over.
Troubleshooting Tip:
If, for any reason, the generator is not detecting the correct size of landscape (after creating one of the supported landscape sizes listed above) then simply click on the “LandmassPreviewMesh” and then change the “Detected Landscape Resolution (Override)” variable to the size of your landscape.
After this is done, click “Back to Defaults” in the MapMakerInterface and it will detect your new landscape size.