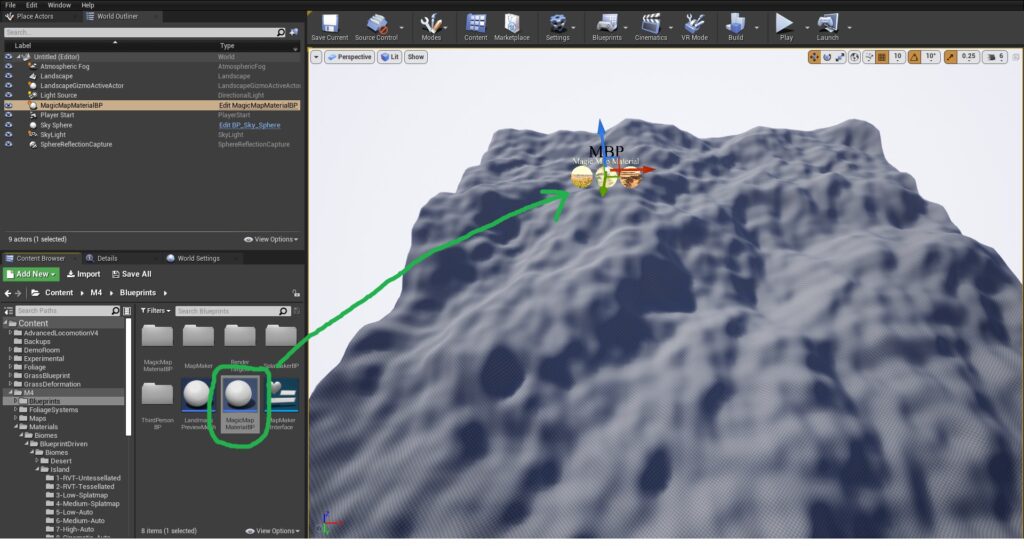
To finalize your new project’s setup, after initializing your project and migrating M4, you need to drag and drop the MagicMapMaterialBP-V2 (found in the “M4/Blueprints/” folder) into your world, then move it to where-ever is convenient for you.

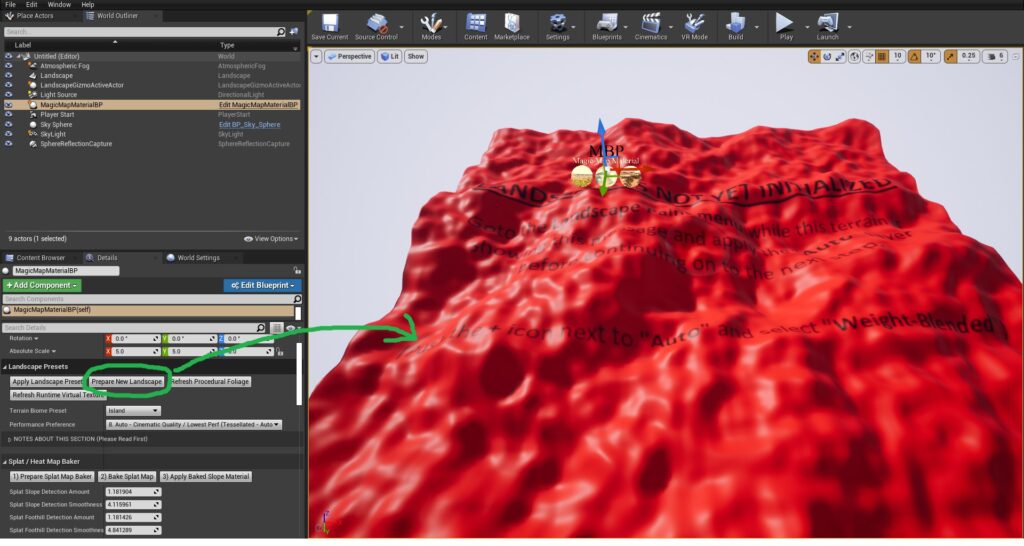
Once the Blueprint is placed in the world, click on it and scroll down to the section called “Landscape Presets” in the details panel. Click on “Prepare New Landscape” and it will apply the initialization material used in M4 to the terrain that’s in your world. This is done to cut down on the initial engine lag when first applying the “Auto” layer in the next step.
Your landscape with then turn bright red with instructions on it, similar to the image on the right.

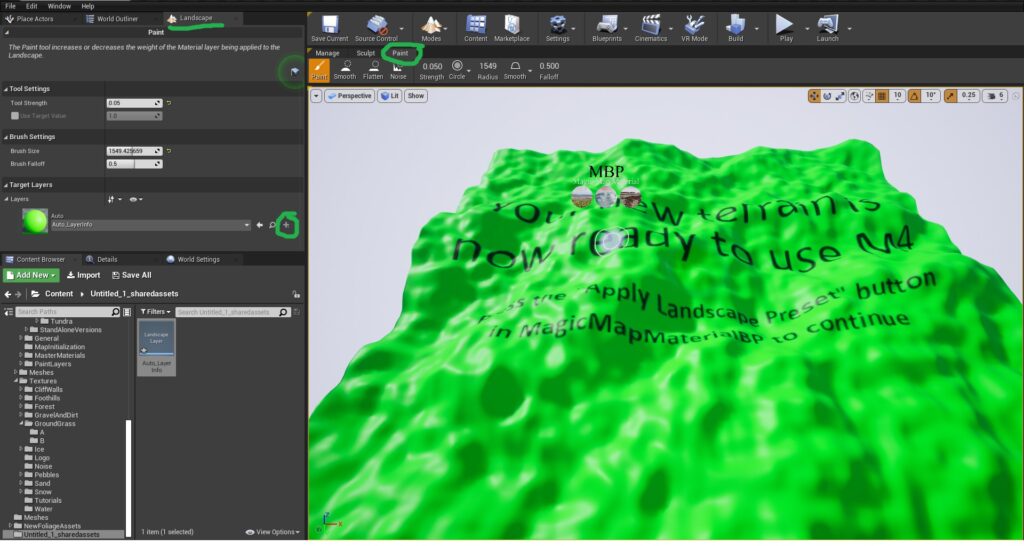
Once you see this red texturing applied to your terrain, navigate to the Terrain Paint Menu within Unreal Engine 4, and click the + icon next to the layer called “Auto” (choose weighted-blended layer). This will turn the terrain green with different instructions on it, like the image to the right. If you need help finding the Terrain Paint Menu within Unreal Engine 4, please see this article.

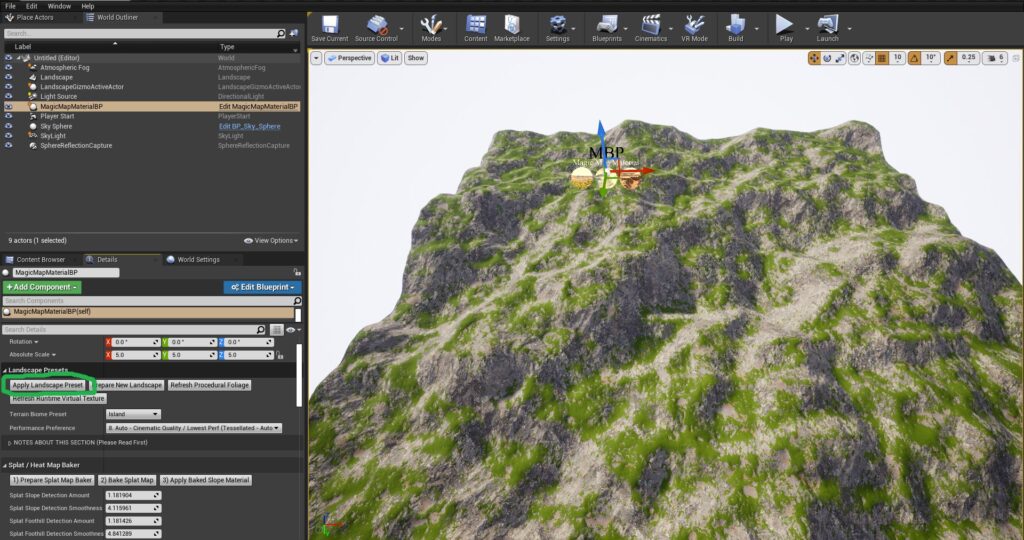
Now we’re ready to apply the actual Auto Material to our new landscape. To do this, first close out the “Landscape” menu that we opened up in the previous step and click on the MagicMapMaterialBP icon again. In the details panel of this, under the “Landscape Presets” section, click the button that’s called “Apply Landscape Preset”, this will apply the default Auto Material to the new terrain. Now your landscape is textured!
M4 is now set up to work with your project. There is only one section left, that is necessary ONLY if you’re planning on using Performance Presets 1-4 which are Splatmap Baked and Runtime Virtual Texturing versions of the Auto Materials, or if you’re planning on using RVT Object Blending or Virtual Heightfield Mesh.
Directions on how to get Runtime Virtual Texturing running with your project can be found here.