My goal with this was to make creating a new paint layer one of the most straightforward processes I’ve seen in any Landscape Material. Here are the steps below on how to create a Custom Paint Layer in M4.
Creating a New Paint Layer
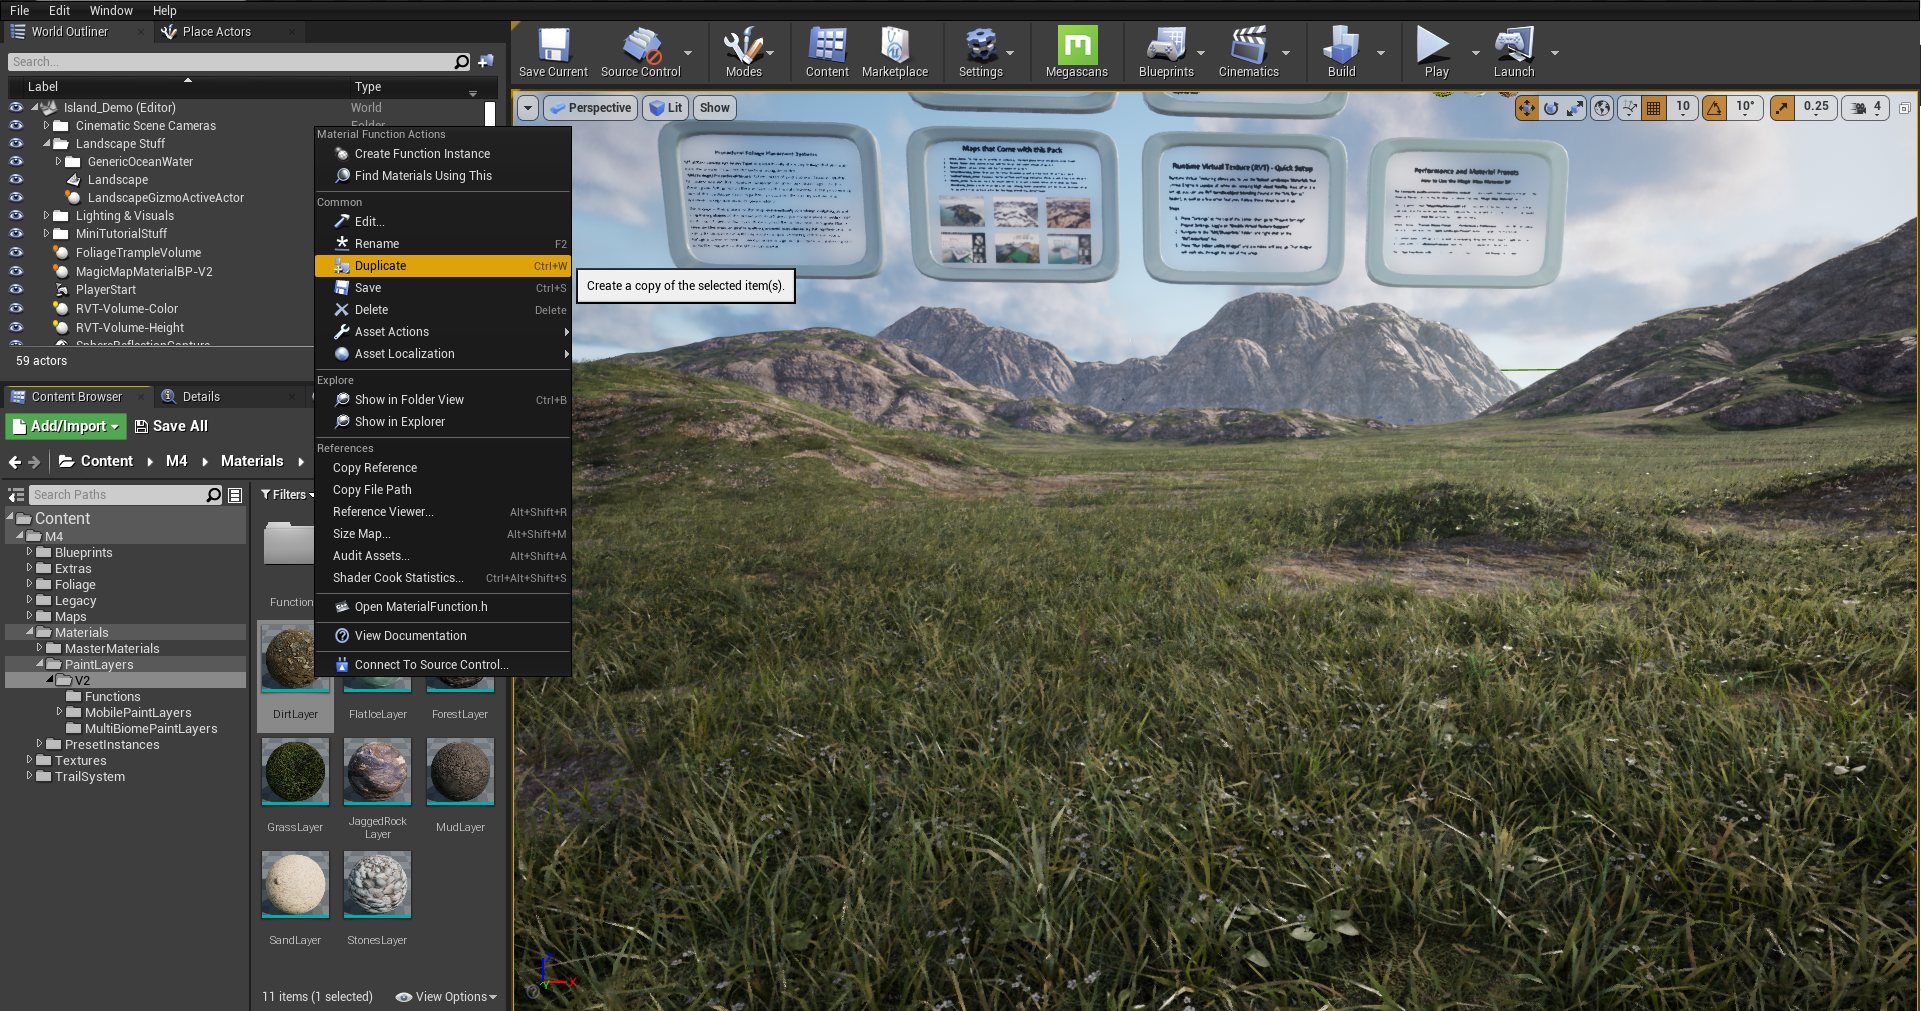
Go to the “M4/Materials/PaintLayers/V2” folder, right click one of the Paint Layers and press “Duplicate” in the right click menu.
Name the Duplicated layer whatever you want. For this example, I’m naming it “MyCustomPaintLayer”
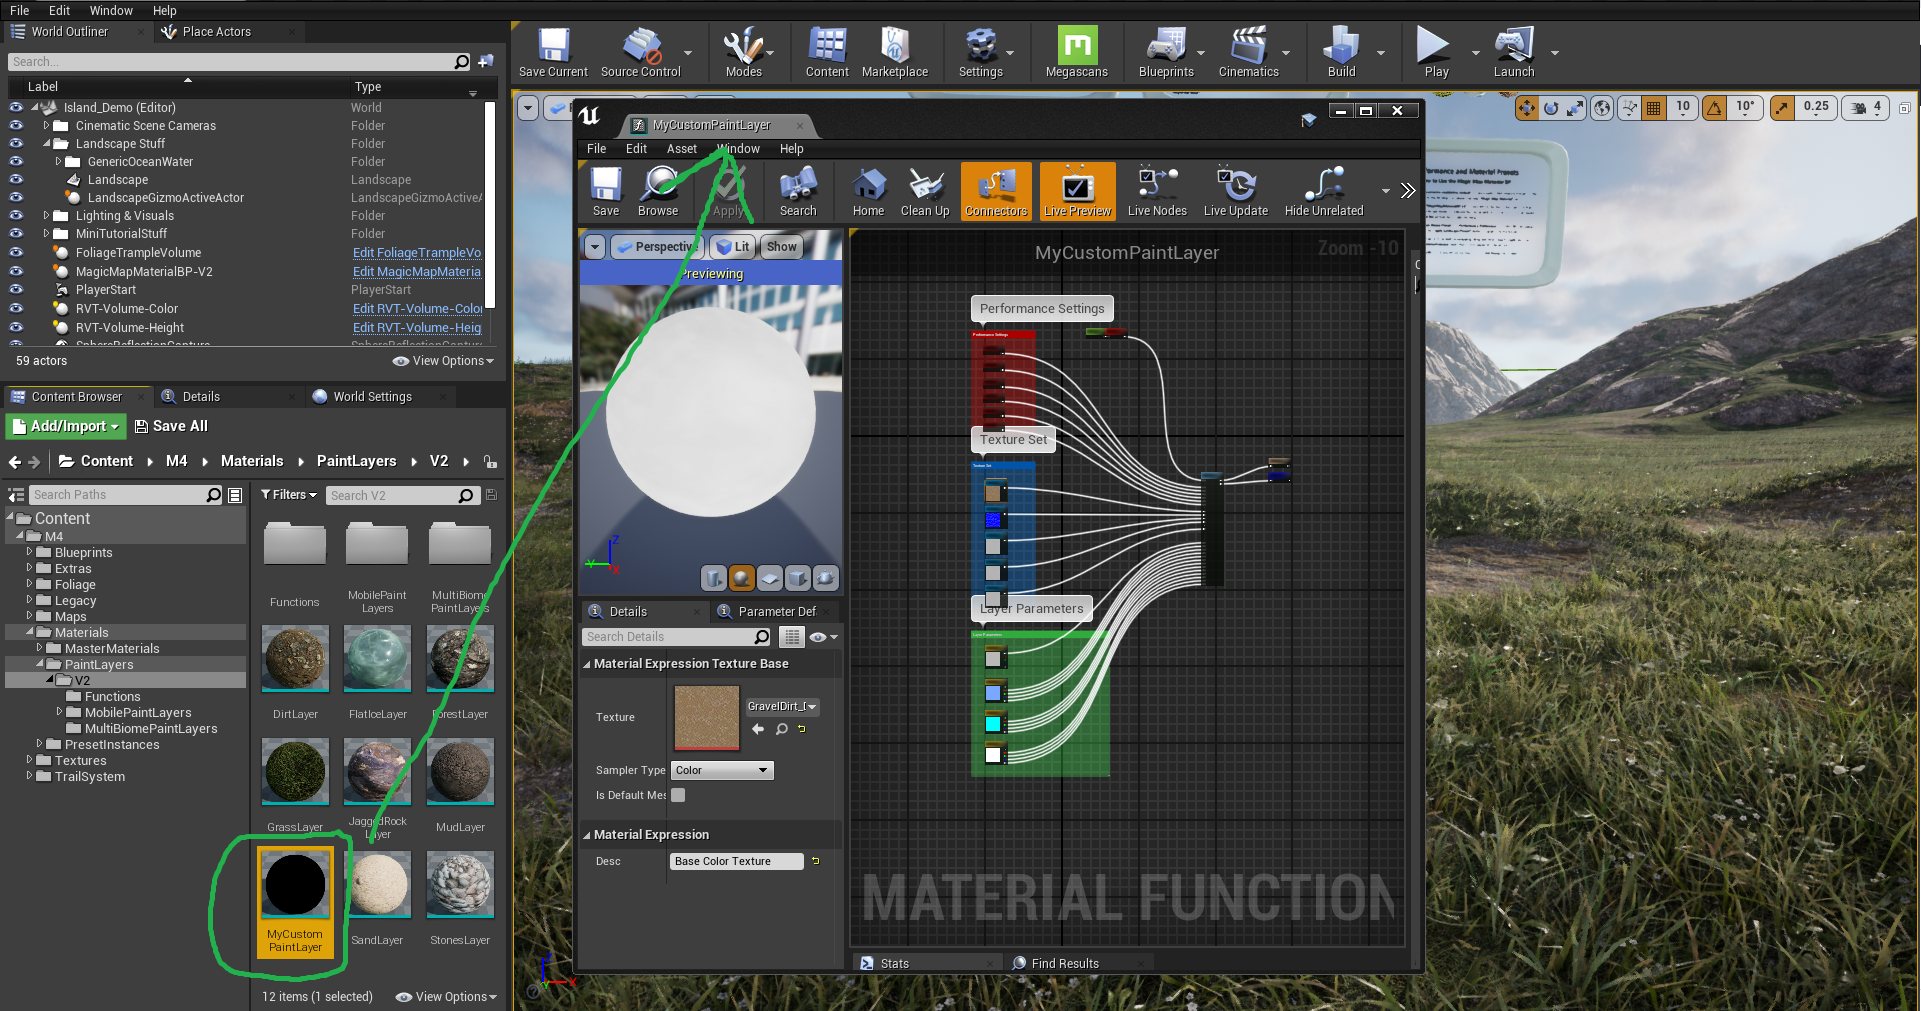
Open up the new Paint Layer that you Duplicated and named. A window will pop up with all of its settings and textures.
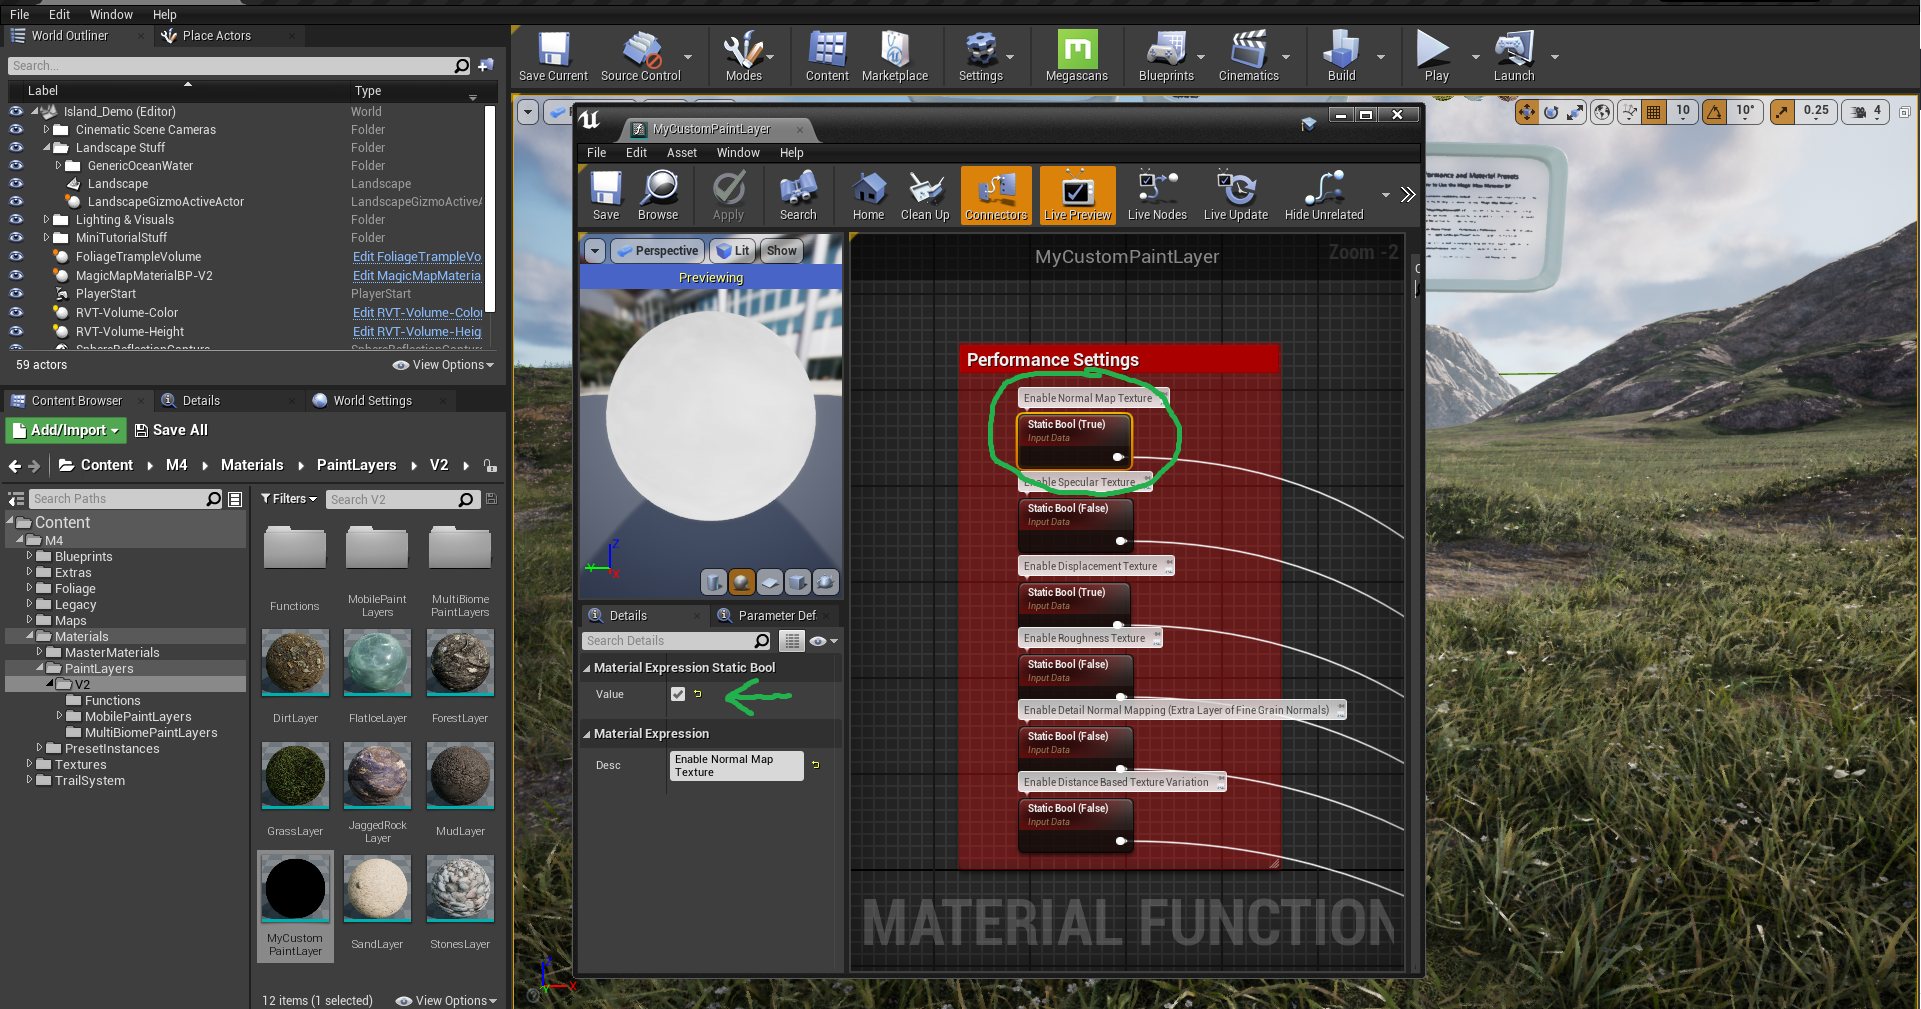
Go to where it says “Performance Settings” in that window and change the performance settings of your Paint Layer to whatever is needed.

Go below that to where it says “Texture Set” in the same Window and swap out the Textures with the ones you want to use.
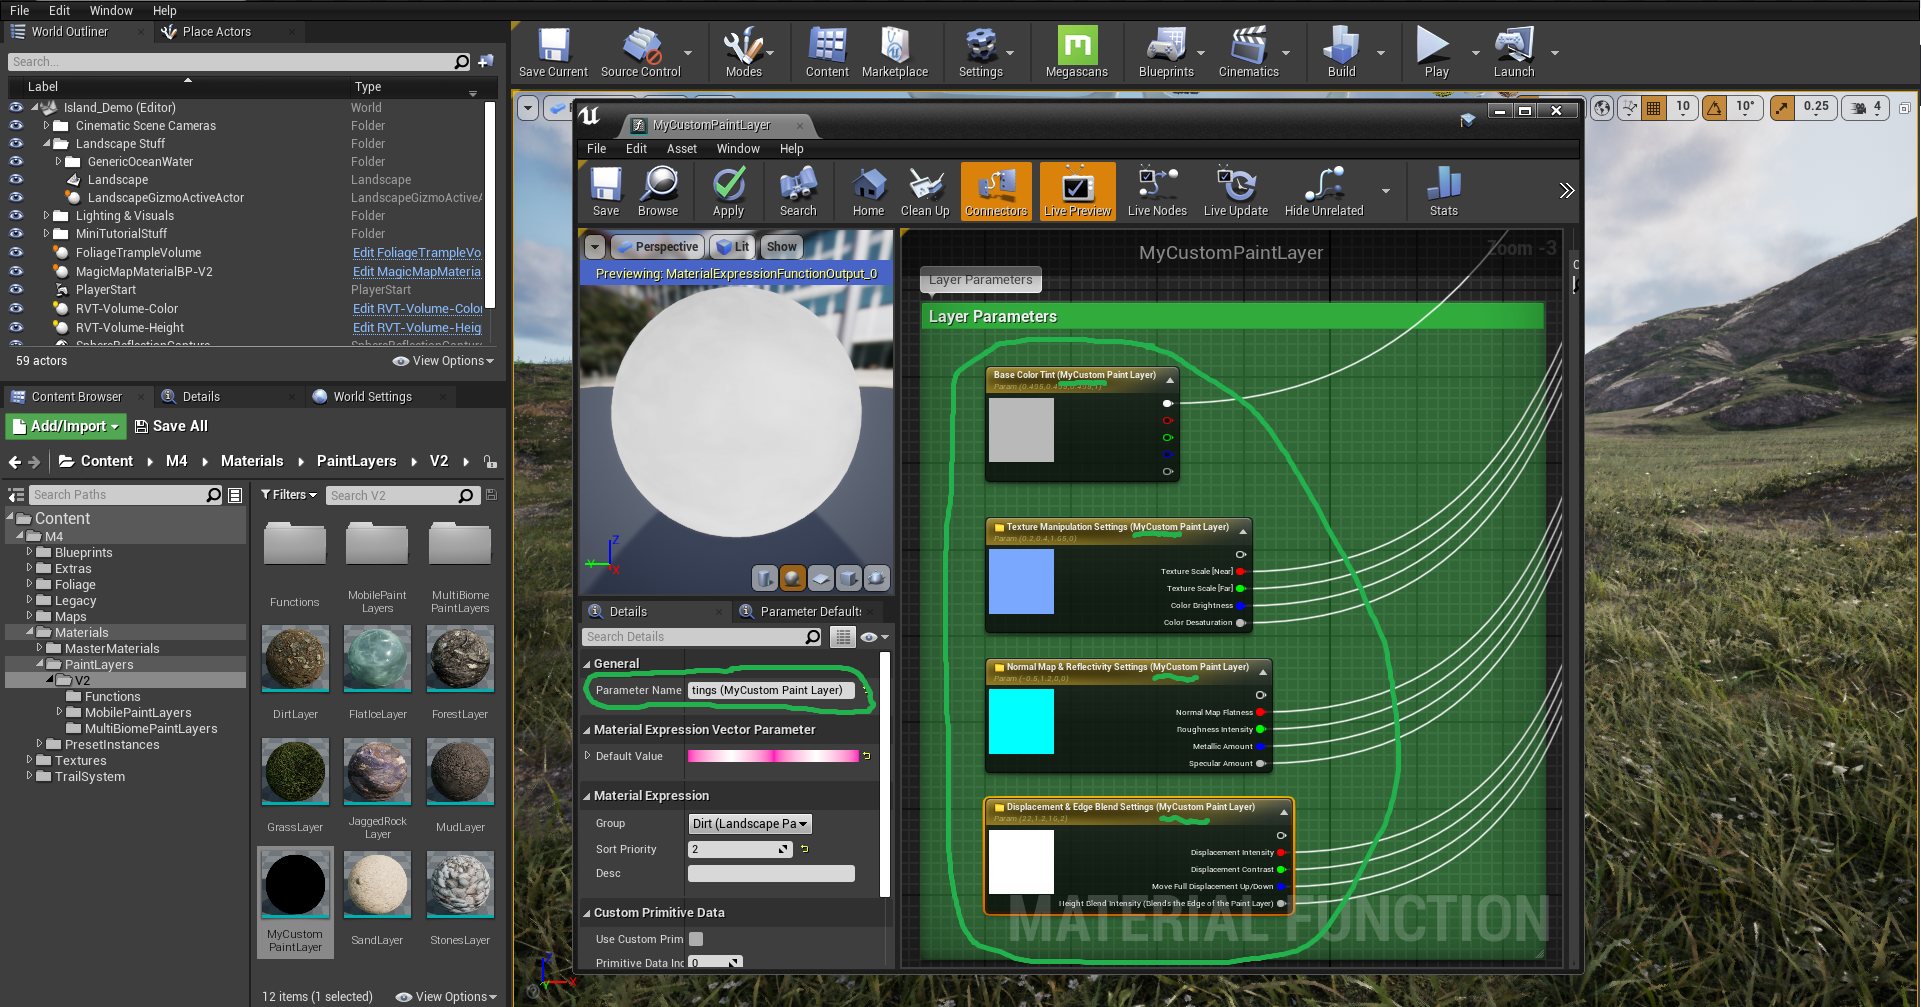
Go below that to where it says “Layer Parameters” in the same Window and change the name of each parameter so that it will be unique in the Material Instance.
It’s best to just put your Paint Layer’s name before the words “Paint Layer” in the parameter name, similar to the picture to the right. Only changing those words within the name of each parameter.

Now select all of the parameters and change their Group Name. This will categorize all of them into their own group within the Material Instance.
After you have changed all of their Group Names to be the same, press “Apply” to apply all of the changes.
After that, close that Window; you’re done with that part of the process.
Assigning the Custom Paint Layer to the Material

Now you’ll want to open up the Master Material, so that you can assign your new Paint Layer within it.
To do this, click on your terrain and open its Material Instance. Then scroll down to the bottom of it and open up the Material that says “Parent” next to it. That is the Master Material.

Once in the Master Material, find the “Layer Blend” node, press the + icon on it.
A new Layer input will be created on the Layer Blend node.
Change the “Layer Name” to your custom Paint Layer name, and set its “Blend Type” to “LB Height Blend”
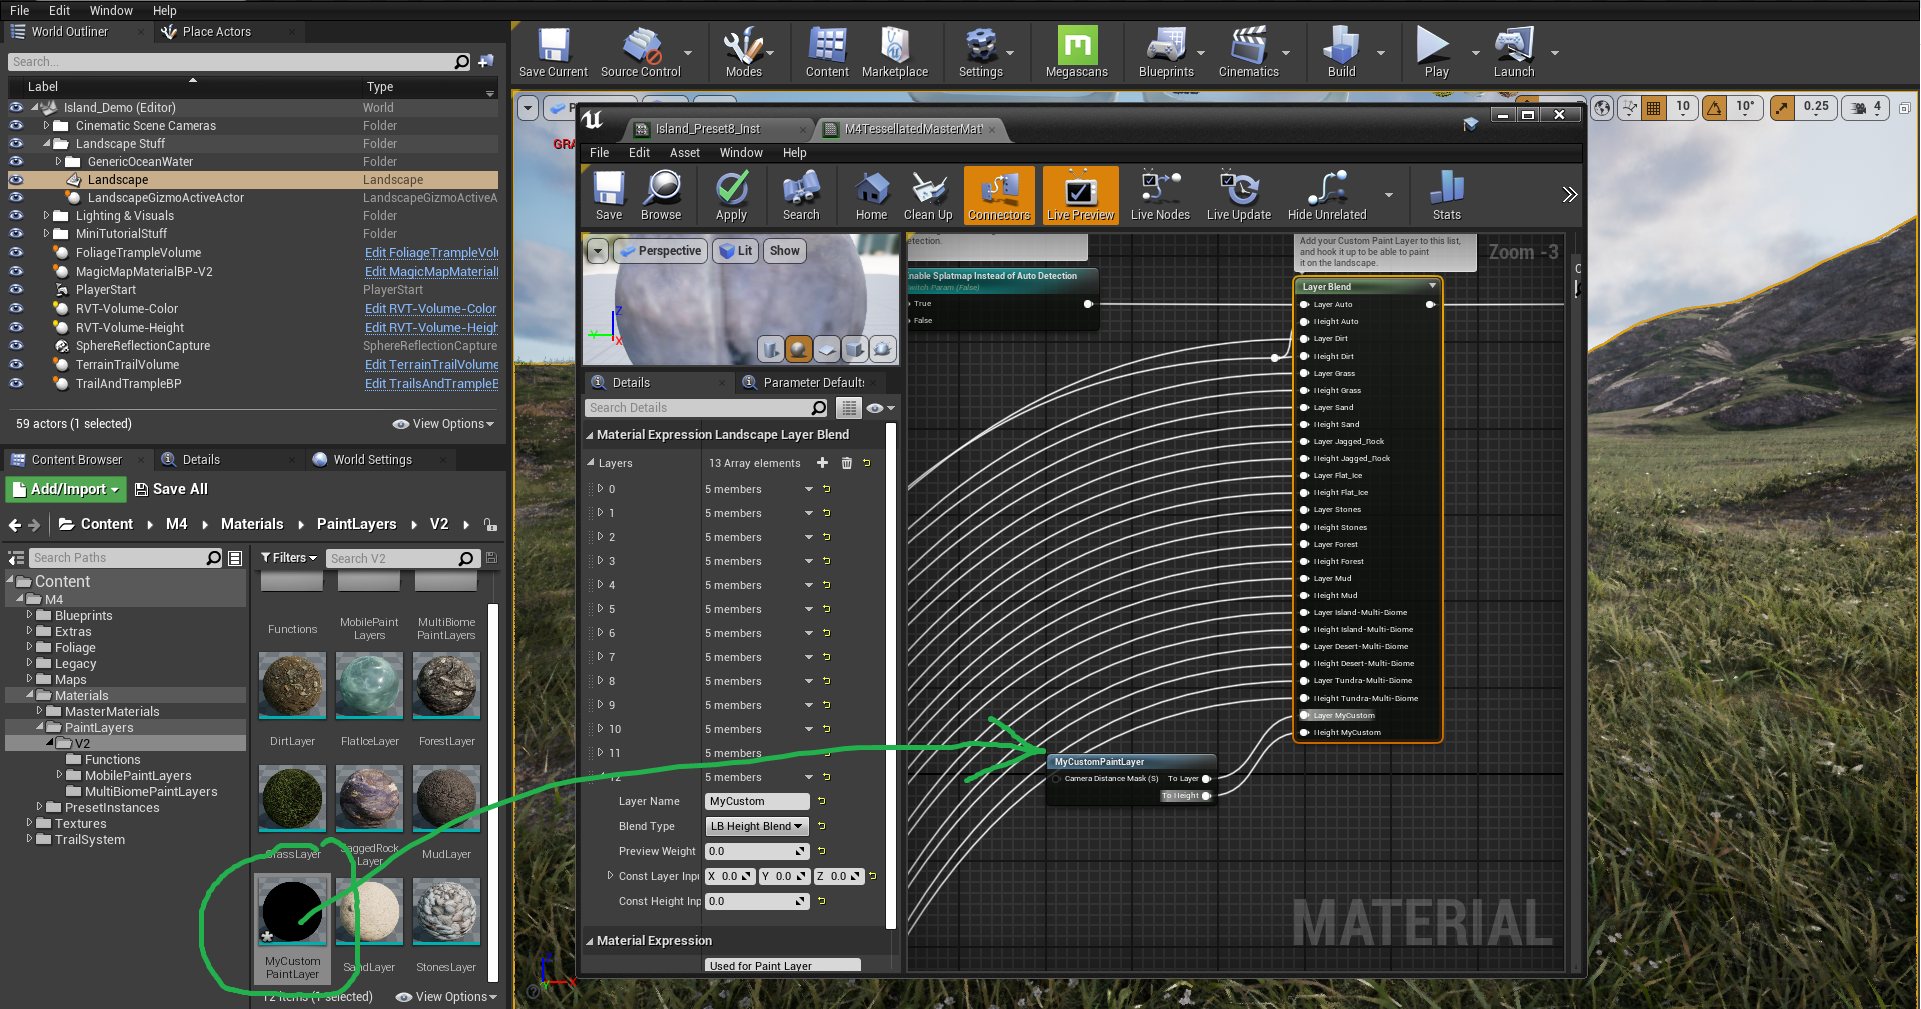
Drag and drop the Paint Layer Function that we created earlier into the Master Material. Hook it up to the inputs we just created.
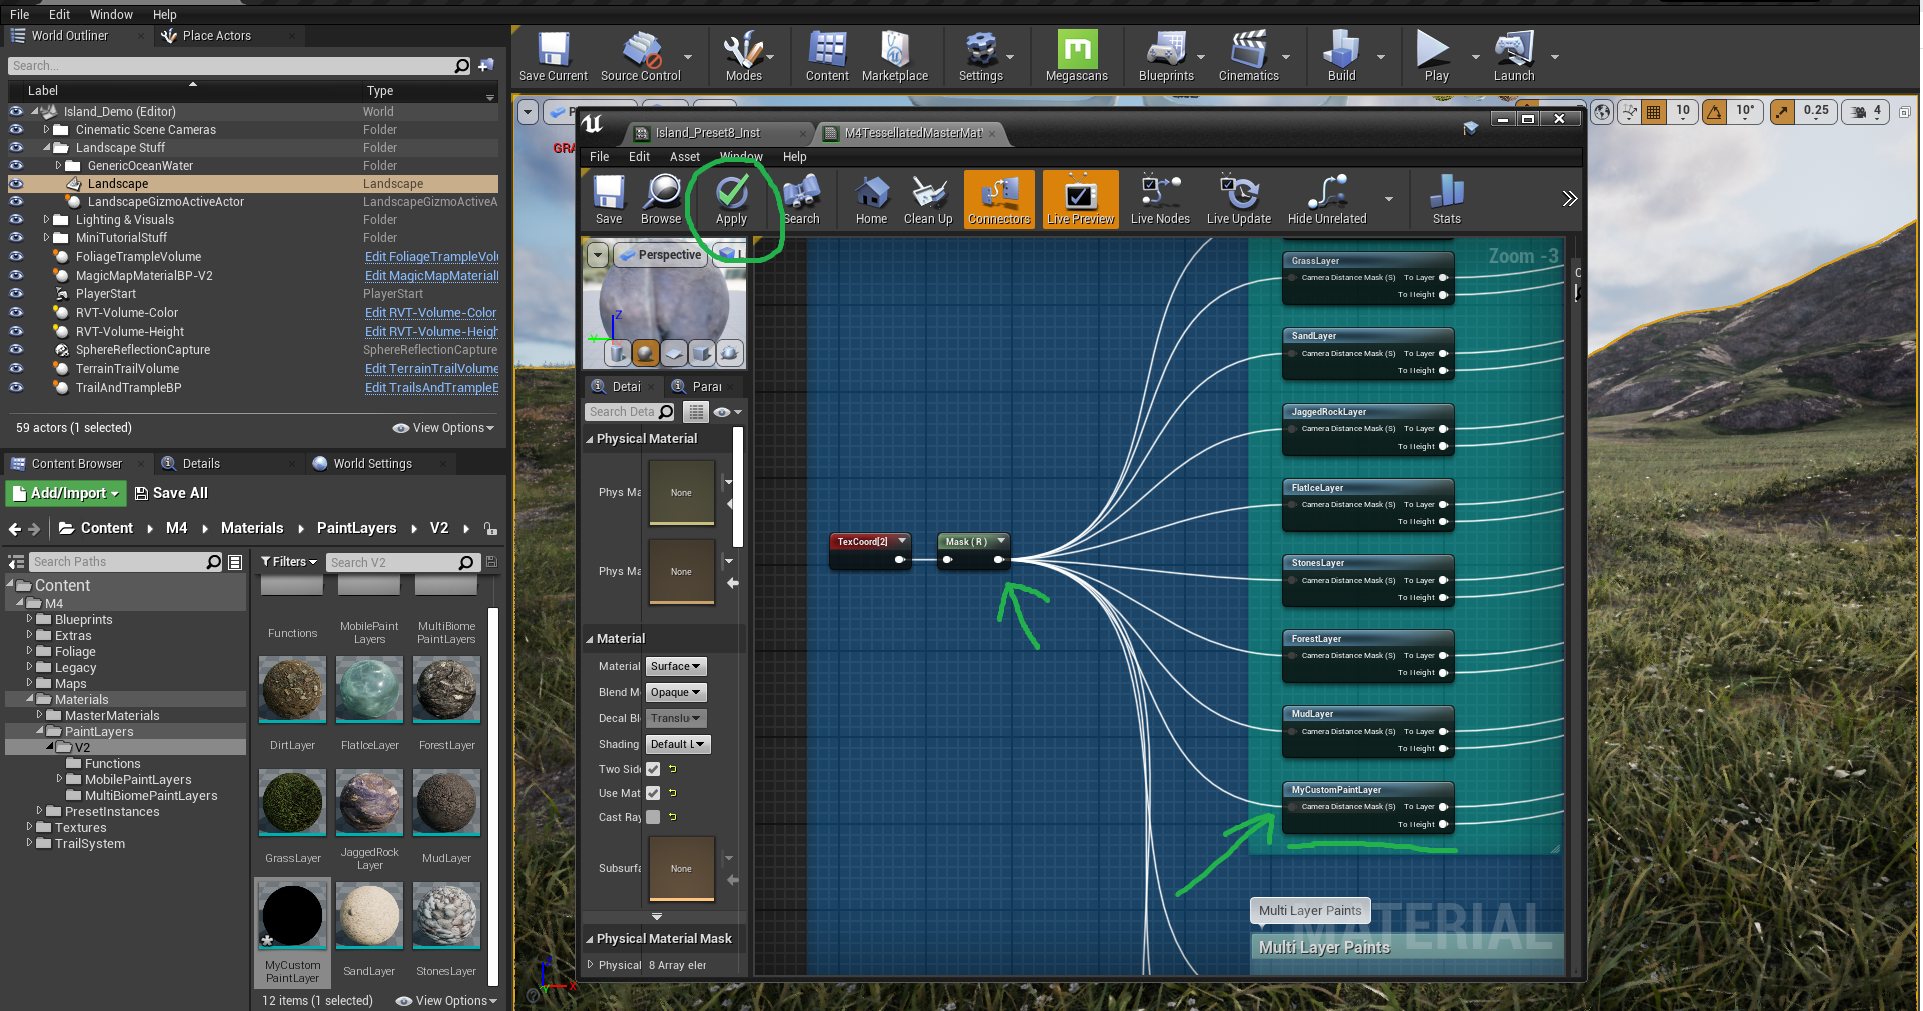
Now take your custom Paint Layer and plug it in similar to the nodes to the left of it (See image to the right for reference).
This will allow the Paint layer to have distance blending if you’ve chosen that as an option.
Press “Apply” after you’re done.
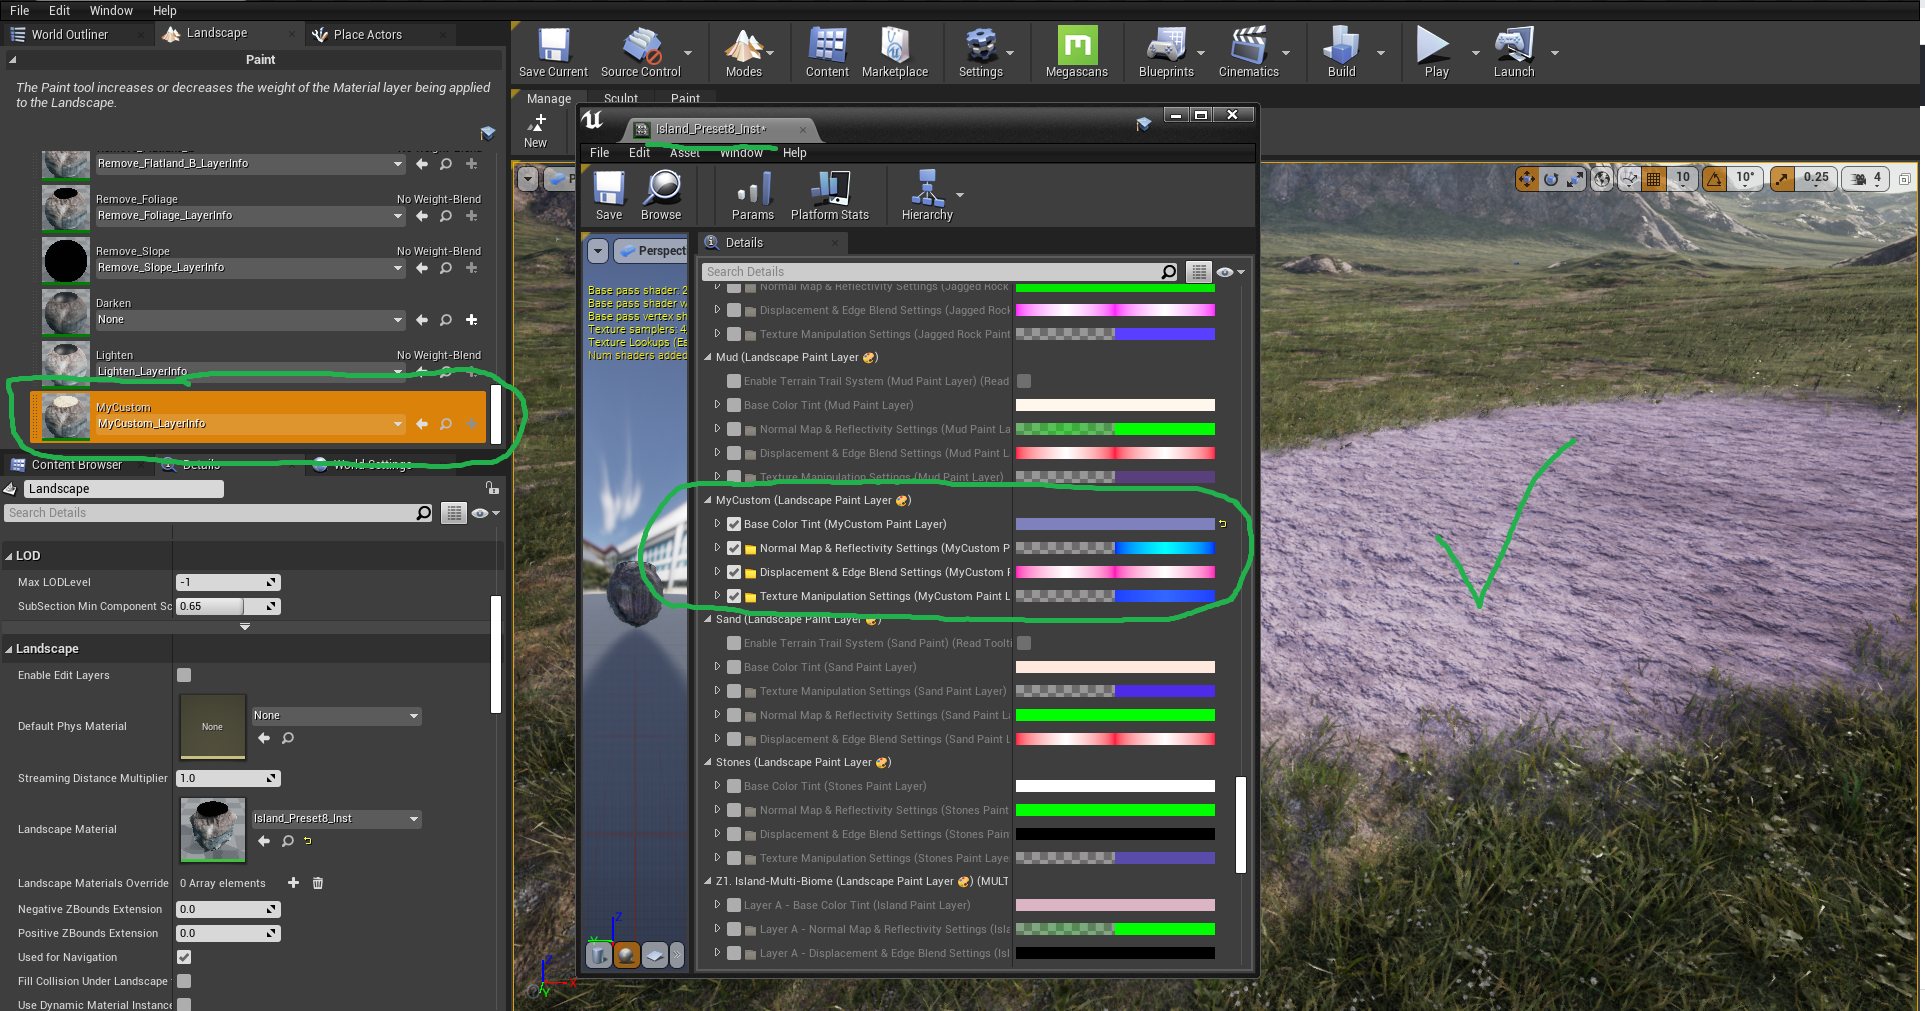
Your paint layer is now done and can now be painted from the Paint Layer Menu (if it’s not showing up there yet, reloading the project will make it show up).
To change its settings that we created, look for them in the Material Instance under the group we created for them earlier in this process.