Integrating Ultra Dynamic Sky‘s dynamic weather system into the materials is a simple drag and drop of one node from the UDS pack and toggling on an option in their Weather Blueprint. Here’s a step by step guide on how to do that.
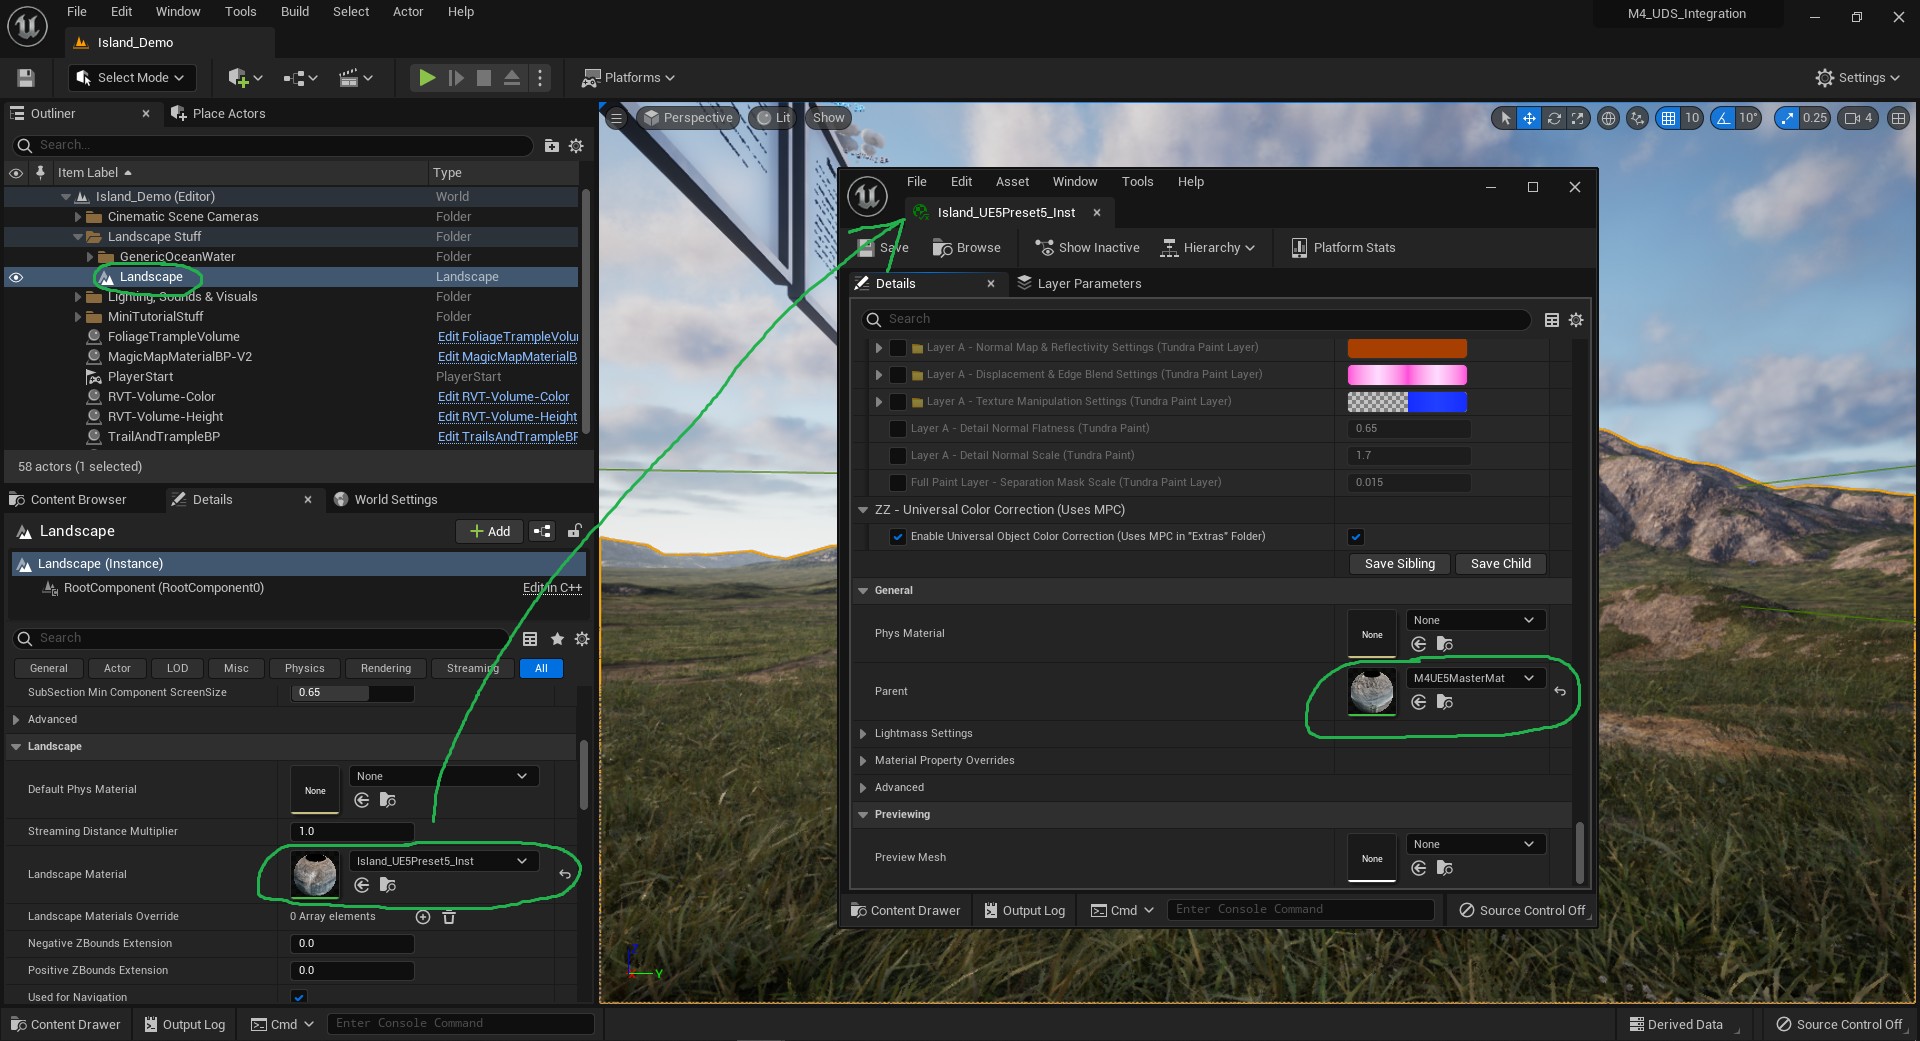
1. Click on the Landscape and open up the Material Instance that is applied to it
2. Scroll down to the bottom of the Material Instance, and open up the Master Material that’s assigned to it
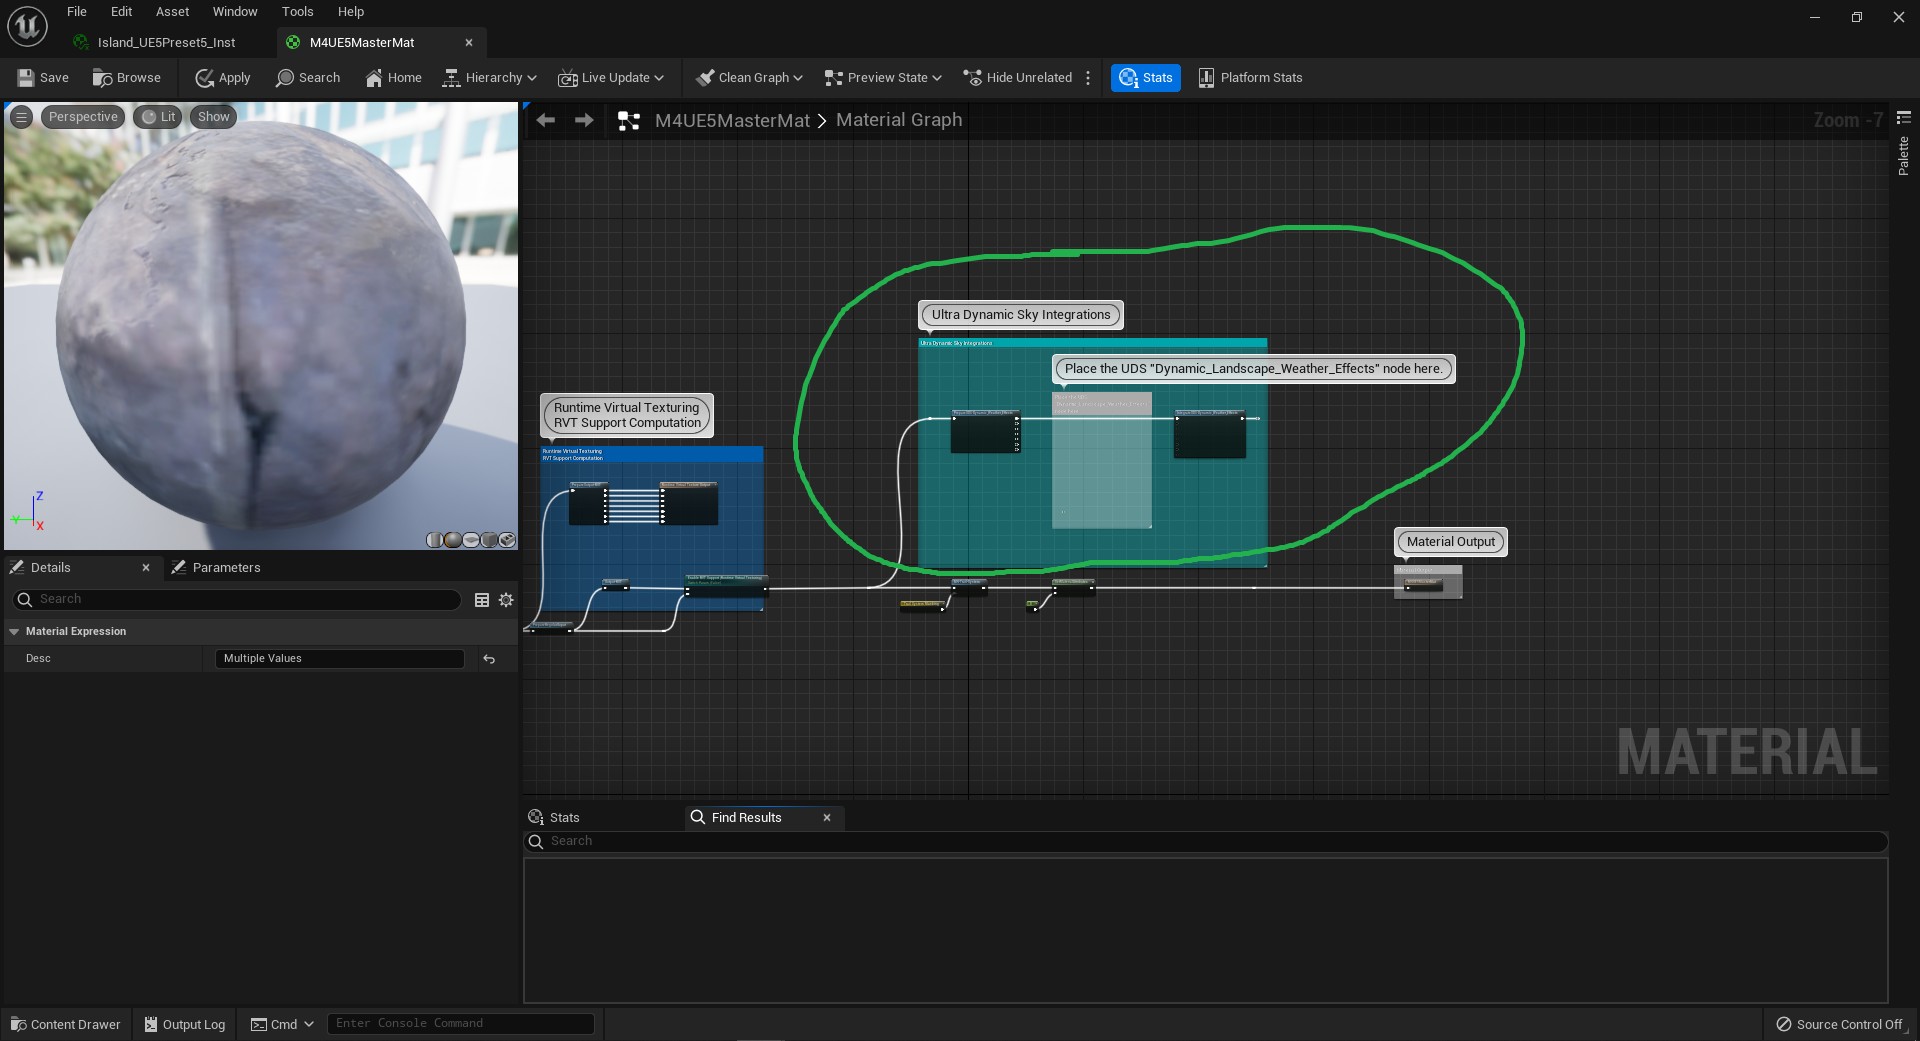
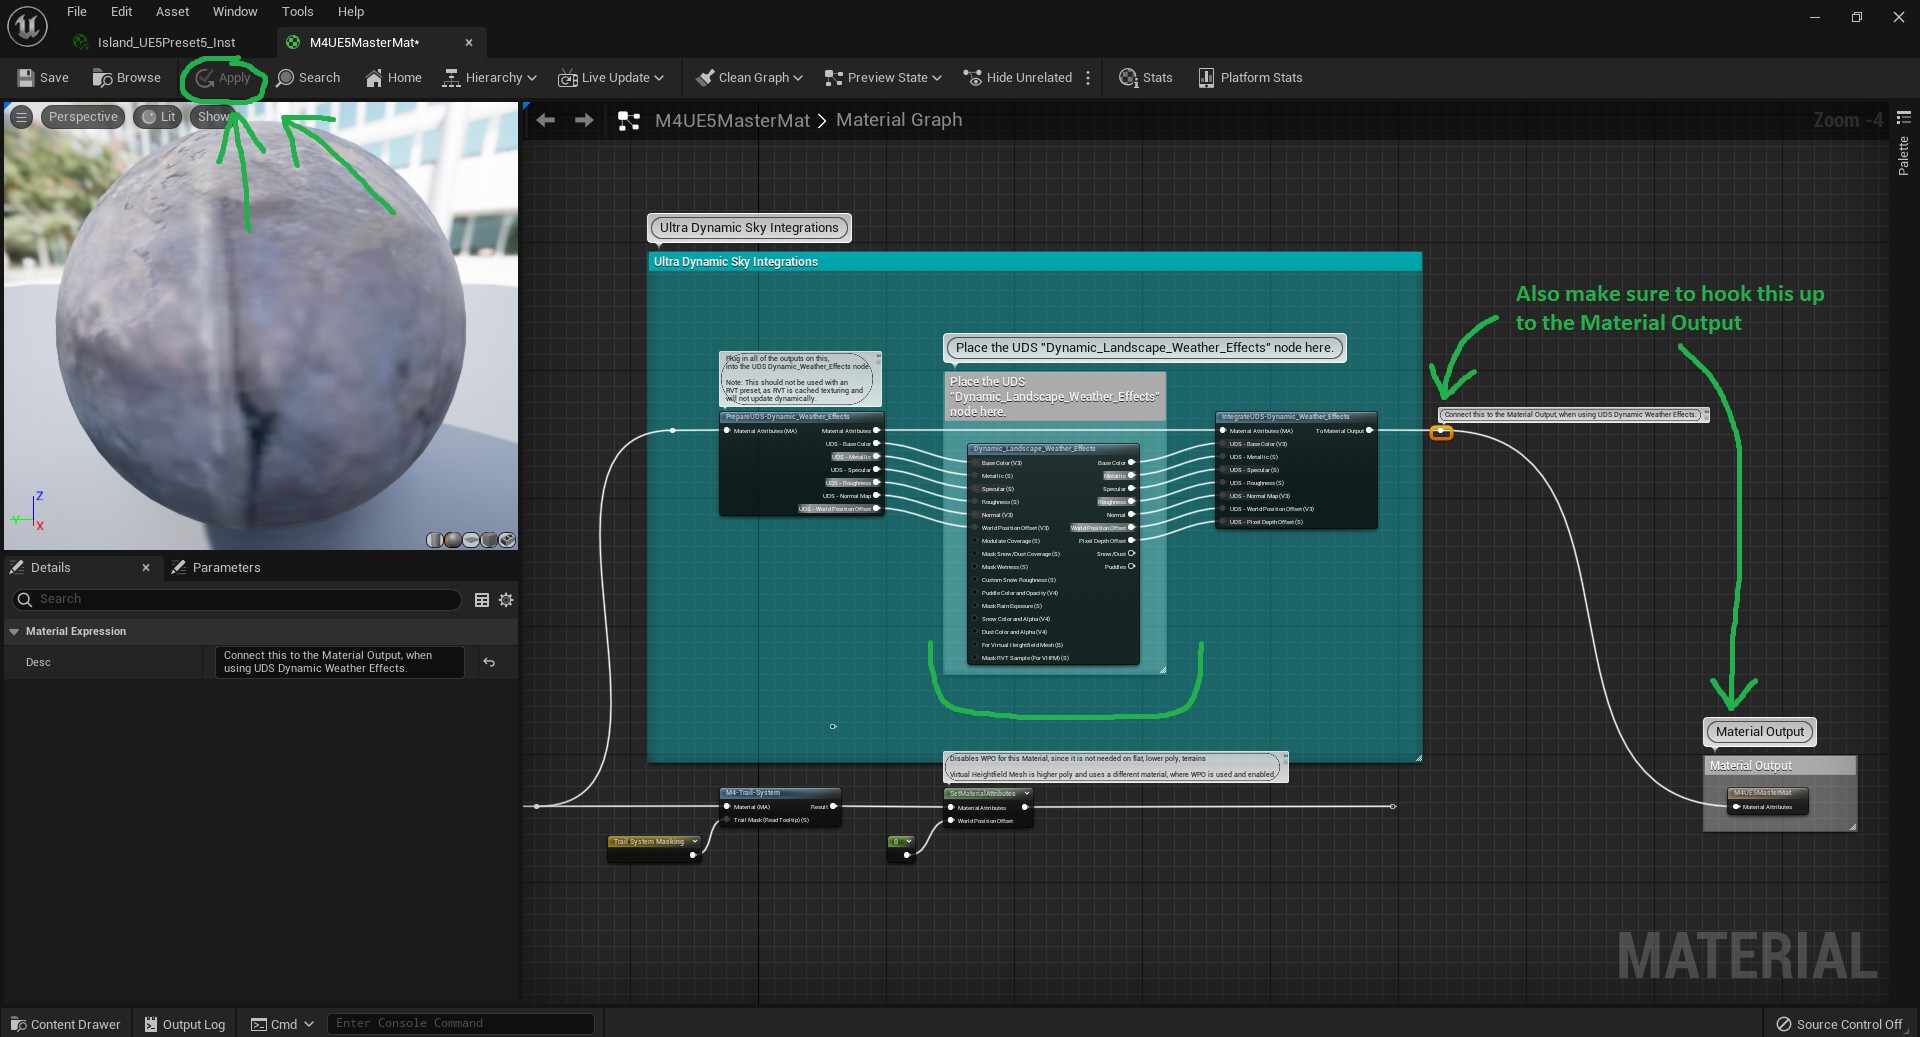
3. In the Master Material, you will see an area for placing the UDS weather node
4. Go to the “UltraDynamicSky/Materials/Weather” folder and drag + drop in the function called “Dynamic_Landscape_Weather_Effects” into the Master Material where it says to place it
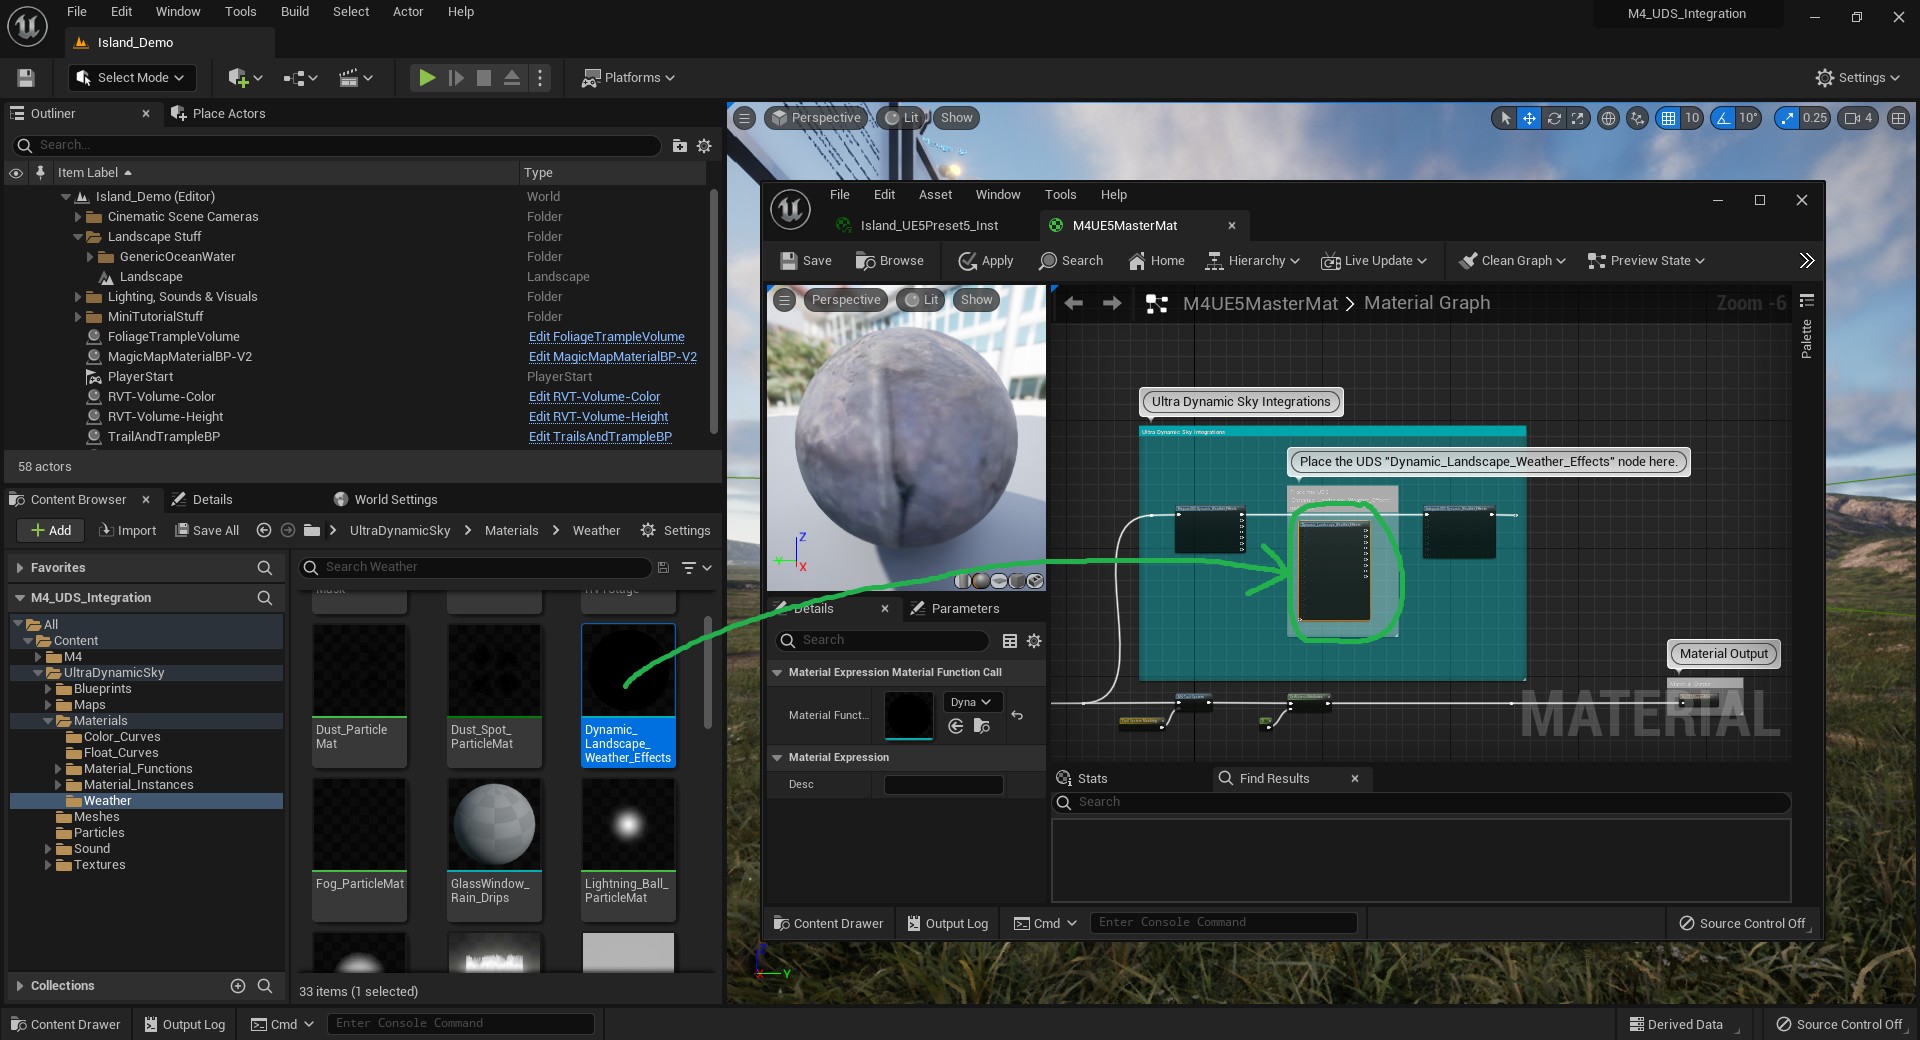
5. Hook up the “Dynamic_Landscape_Weather_Effects” node inside the Master Material. Then press “Apply“
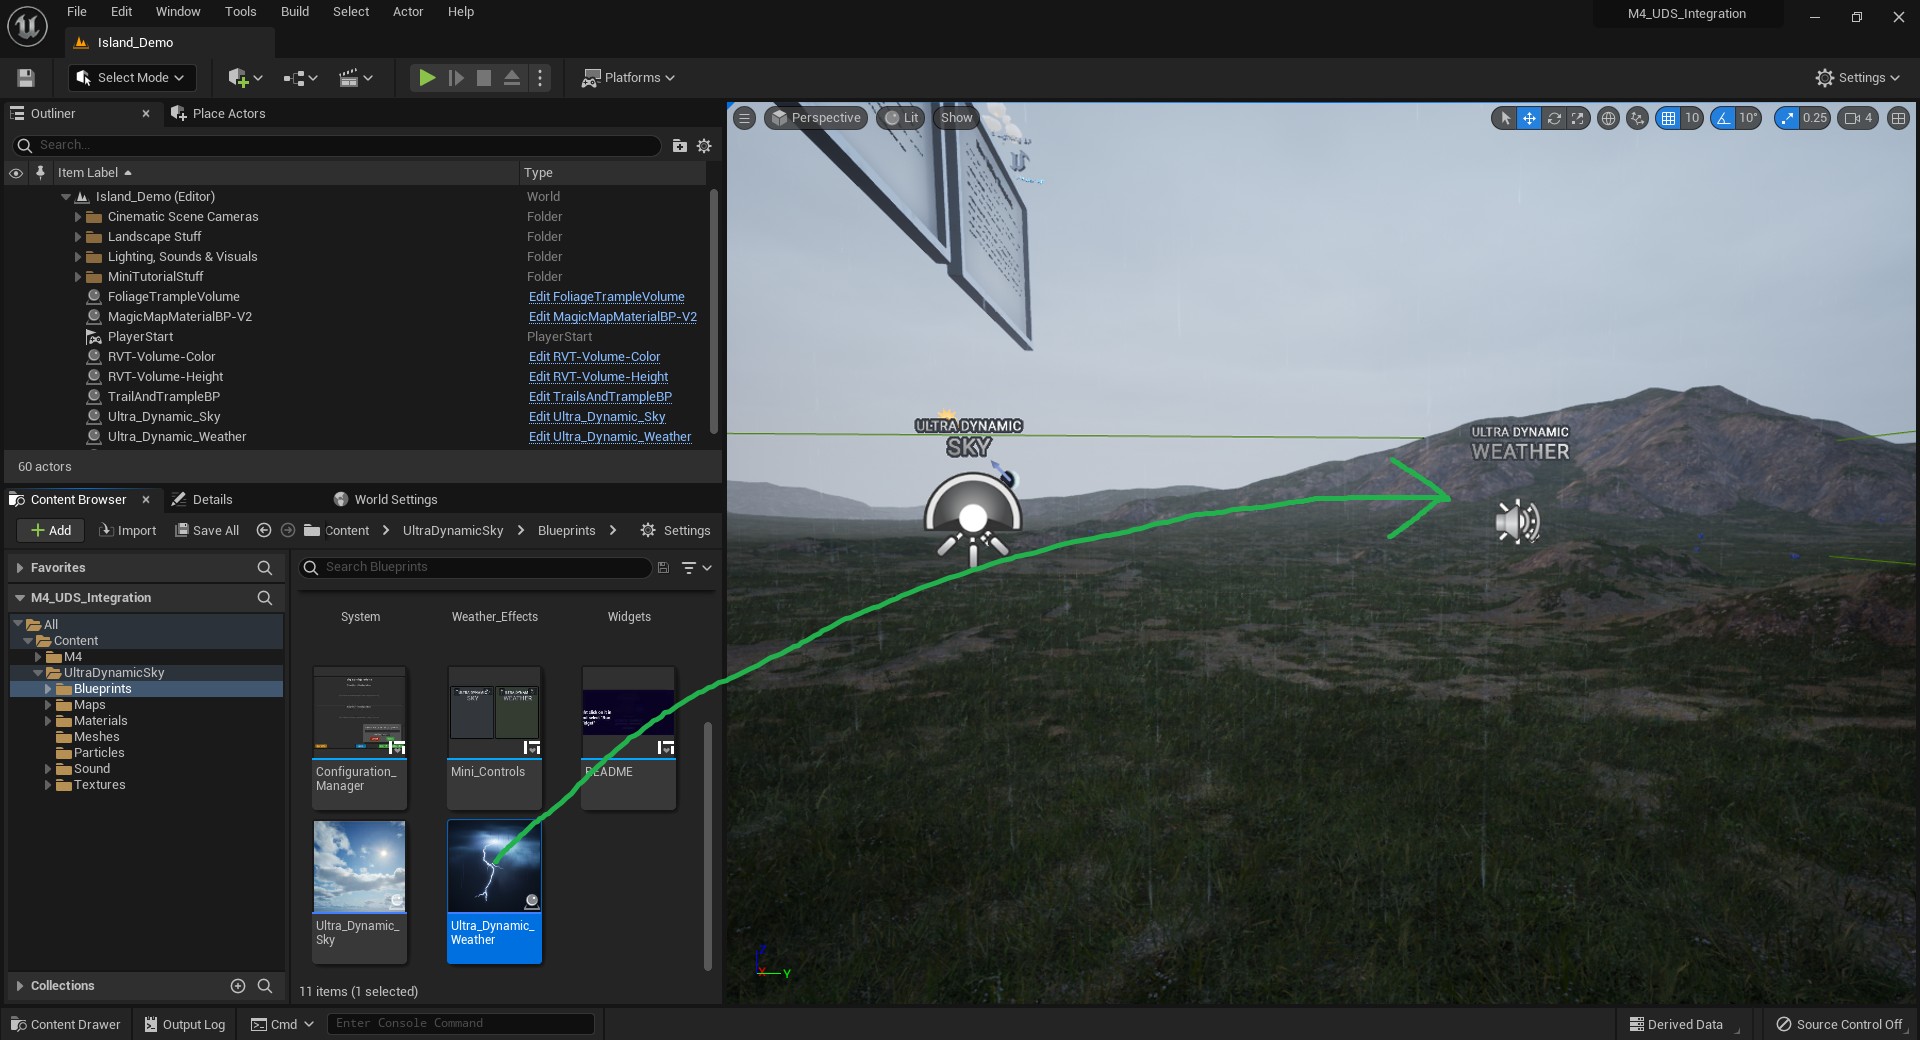
6. Go to the “UltraDynamicSky/Blueprints” folder and drag + drop in the “Ultra_Dynamic_Weather” Blueprint into the world
7. Now click on the Landscape Actor and open up the Material Instance that is applied to it.
8. Type in “Ultra Dynamic Sky” into the search bar of the Material Instance that pops up.
9. A setting will show up called “Use with Ultra Dynamic Sky Weather Effects“. Toggle that setting on.