Before migrating M4 to a new project you’ll first have to initialize a Plugin and Project Setting that it utilizes in order perform the multiple functions that M4 uses. All of these settings come with Unreal Engine 4.25, 4.26, 4.27, and 5.0 as standard, but are disabled by default.
We will need two different settings to be enabled in order for the project to work fully – Runtime Virtual Texturing (used for Splatmap Baking and the Runtime Virtual Texture versions of the materials – Presets 1- 4 and a couple other newer features) and the Landmass plugin (used in portions of the Procedural Terrain Generator).
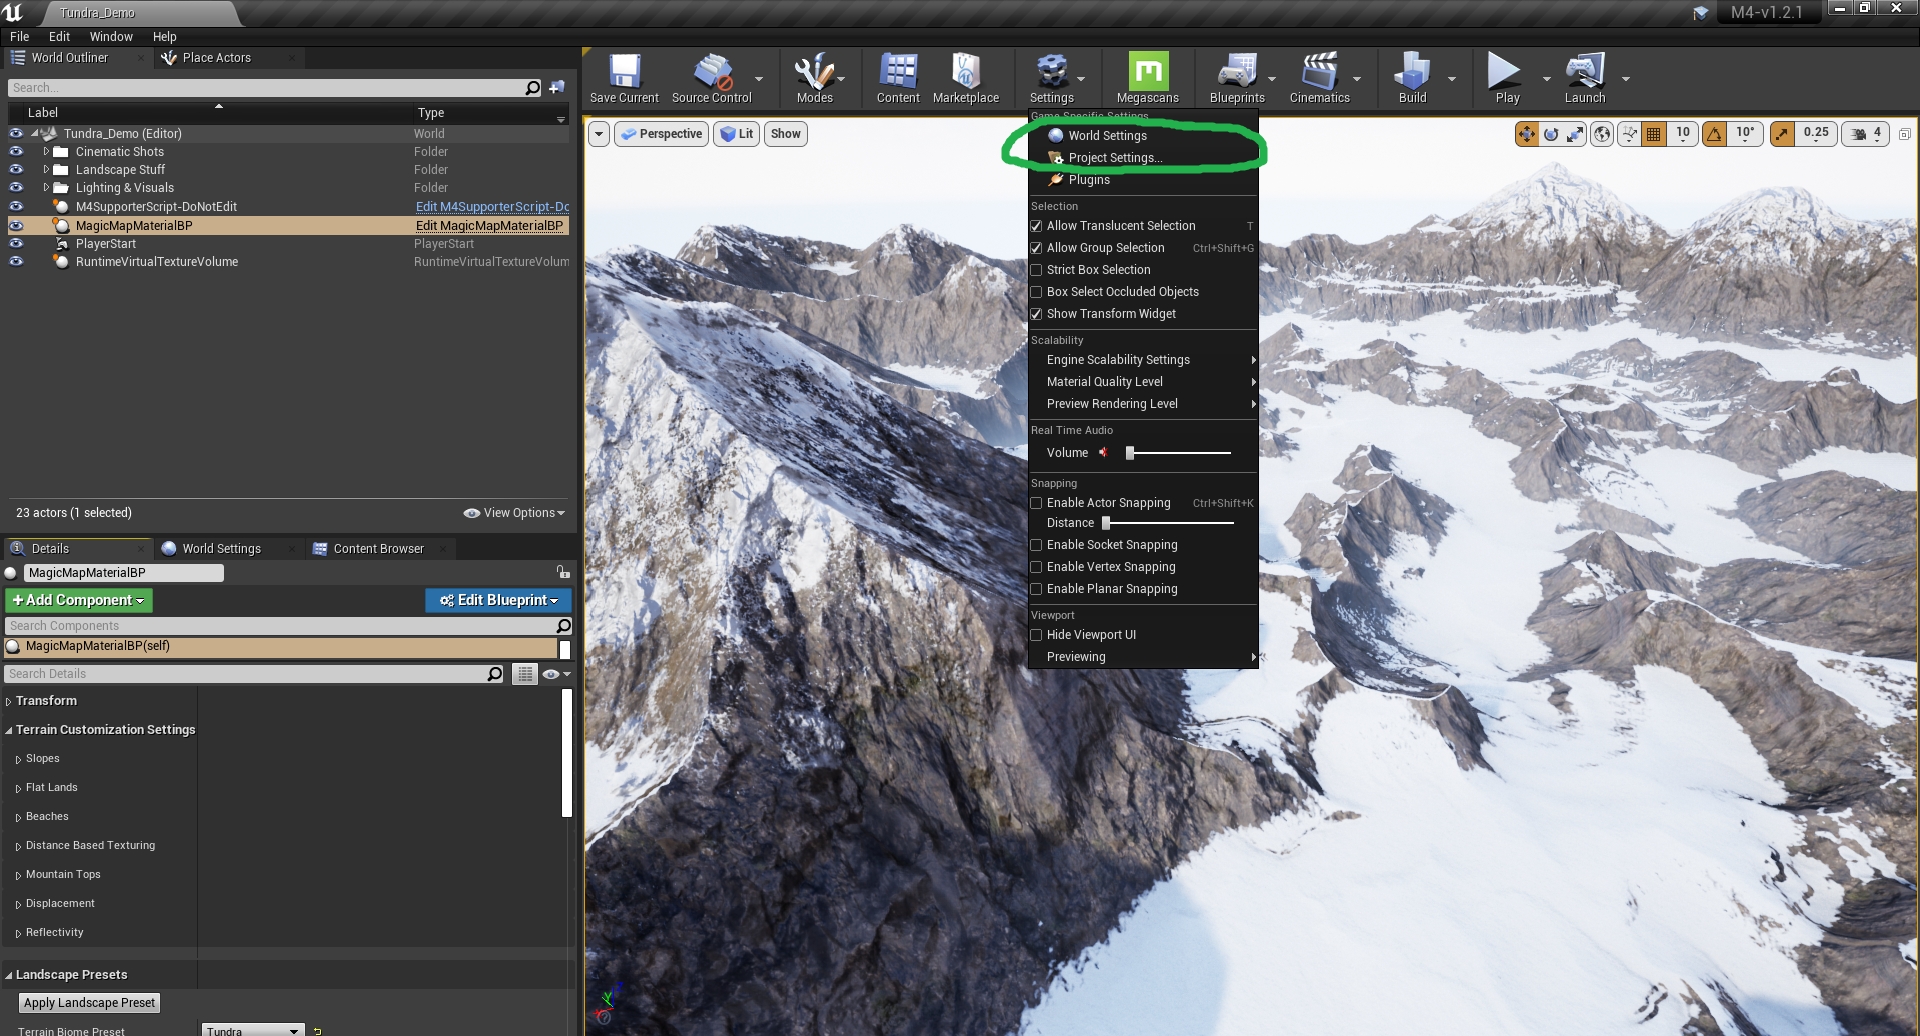
To get started, first click on “Settings” at the top of the Viewport window in the project you’re wanting to migrate M4 to (looks like a gears icon). There you’ll find multiple options, two near the top called “Project Settings…” and another called “Plugins”. Click on both “Project Settings…” and “Plugins” to open a window for each.
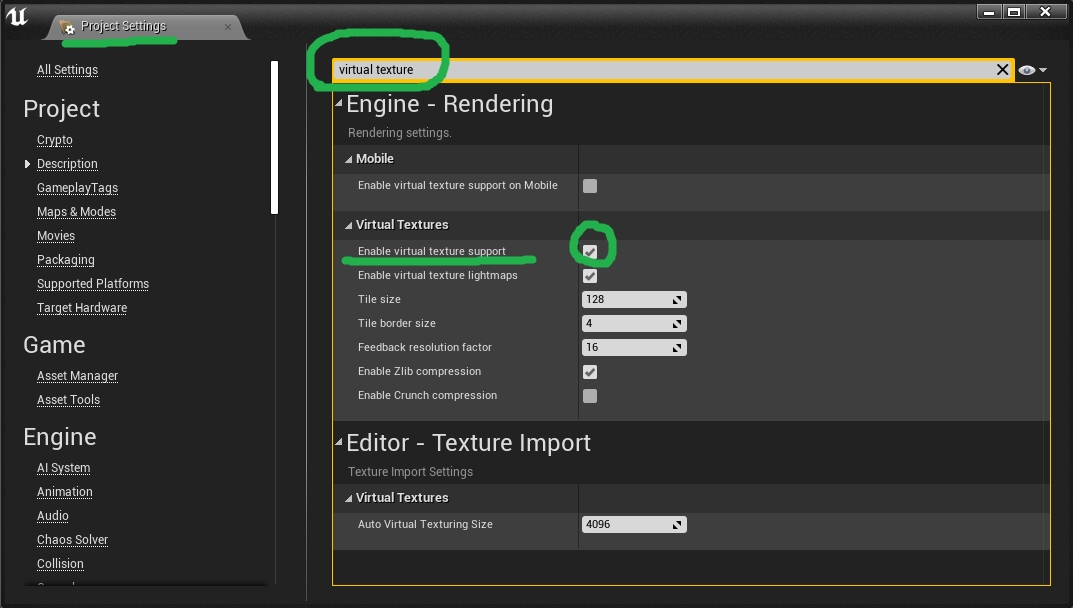
Step 1: First, let’s start by enabling Virtual Texture Support. In the “Project Settings” window, type in “Virtual Texture” into the search box. Enable the settings called “Enable virtual texture support”.
The editor will then ask if you want to restart, don’t restart at this time, as we’ll be enabling one more thing before doing so…
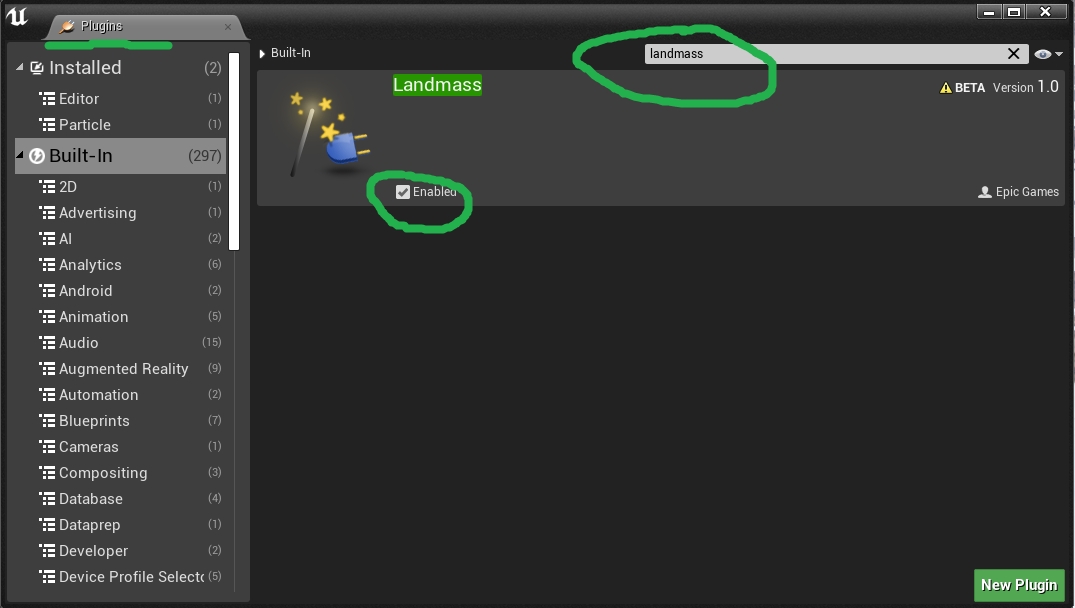
Step 2: Next, go to the Plugins window that you opened and type “Landmass” into the search bar. This will bring up the Landmass Plugin, which comes with Unreal Engine 4. Activate the Landmass Plugin and restart the Editor.
Your project is now set up with the prerequisites for M4! Now we can move on to the migration phase of using it within your project.