One of the newest experimental engine features added to M4 is Virtual Heightfield support. This achieves high quality displacement in UE4 and UE5, while saving on performance compared to regular Tessellation. To use this feature, follow these steps.

1. Preparing Your Project:
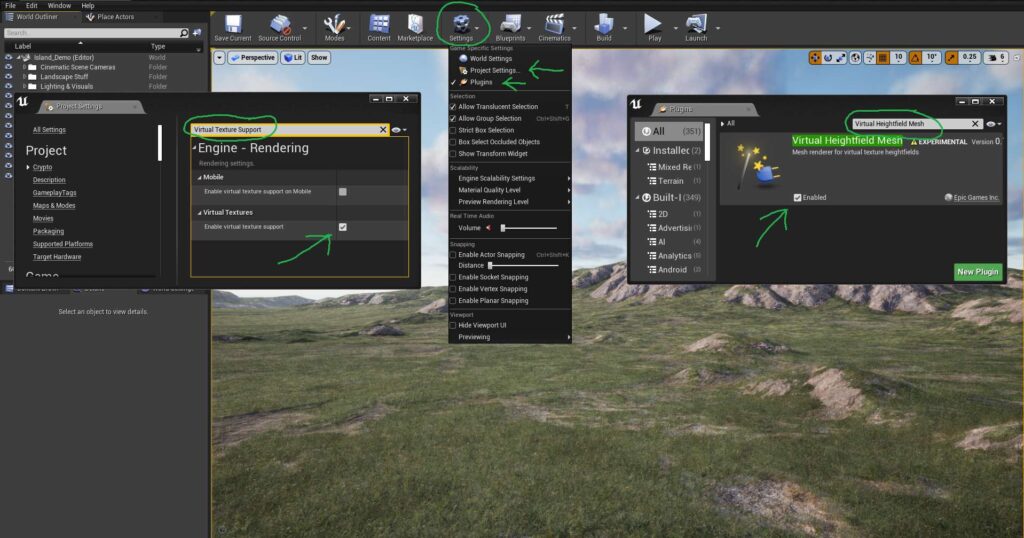
- Press “Settings” at the top of the Editor, then go to “Plugins”. In Plugins, enable “Virtual Heightfield Mesh”
- Press “Settings” at the top of the Editor, then go to “Project Settings”. In Project Settings, toggle “Enable Virtual Texture Support”
- Restart the Editor to activate the settings

2. Create Runtime Virtual Texture Volumes:
Make sure that you have Runtime Virtual Texture Volumes Spawned into your world as Virtual Heightfield Mesh utilizes RVT.
If this is not yet done:
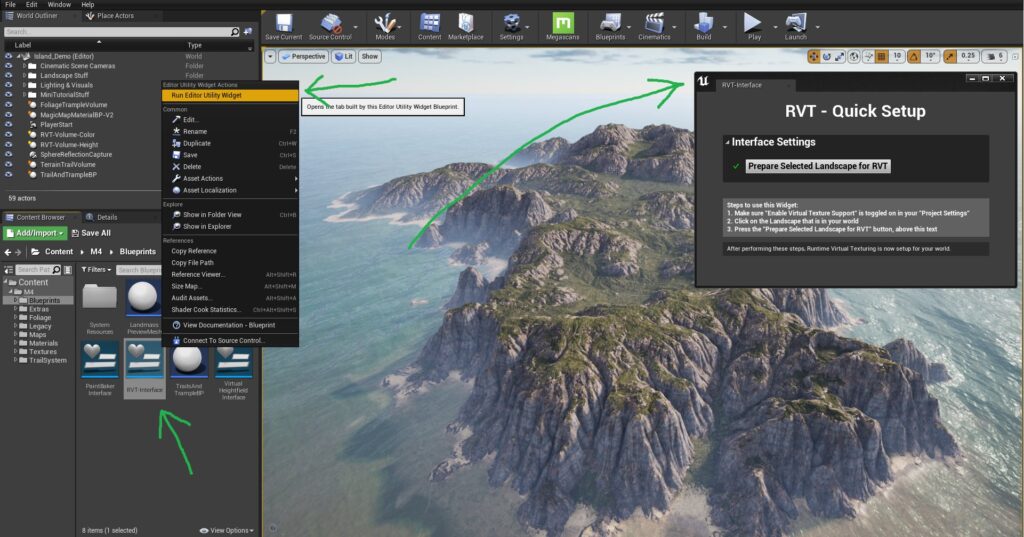
- Go to the “M4/Blueprints” folder and right click on the file called “RVT-Interface”
- In the right click menu, select “Run Editor Utility Widget”.
- A window will pop up, the directions in that window will guide you through the rest of the RVT setup.

3. Launch the Virtual Heightfield Easy Setup Widget
- Go to the “M4/Blueprints” folder
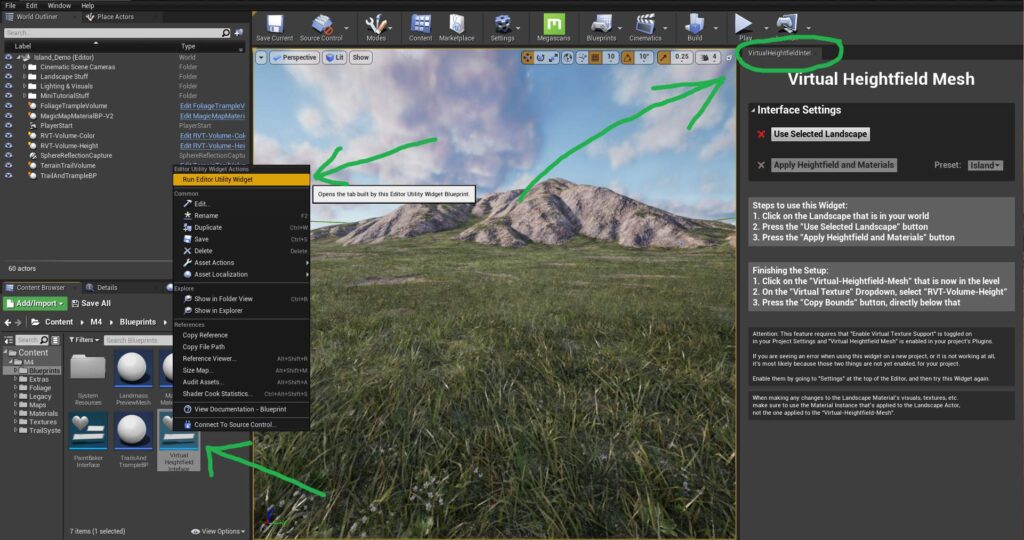
- Right click on “VirtualHeightfieldInterface” and select “Run Editor Utility Widget”
- A window will pop up, dock it anywhere you wish and follow the steps in that window.
You should now have VHFM running with highly optimized settings already set up after following these steps
IMPORTANT NOTE: When making any changes to the Landscape Material’s visuals, textures, etc. make sure to use the Material Instance that’s applied to the Landscape Actor, not the one applied to the “Virtual-Heightfield-Mesh“.